 Picture frames require precision cutting to achieve 45° mitred edges. This process is usually achieved by using a guillotine, which leaves perfectly smooth 45° edges.
The next step is to accurately join the four equal mitred edges together to form the frame.
Traditionally, this used to be done by hammering picture framing pins in from the sides of the frame and was not the most efficient way of creating perfect joins. You sometimes come across very old frames that have been joined this way and, although they have lasted a long time, their corners usually show gaps. Sometimes those gaps can be large as well as dangerous looking!
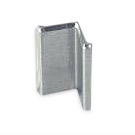
The industry standard method for joining picture frame corners these days is to use V-Nails (“V” shaped nails) to join the 45° corners together.
The V-nails have one sharp ‘V’ and one blunt ‘V’ end. The sharp end gets pushed into the 45° mitre wood corners. They are also designed to pull the joints together when inserted.
The industry uses underpinners to insert V-nails, and smaller types of over/under pinner are available for the hobby/enthusiast markets which do an equally good job, albeit perhaps at a slower pace.
V-nails themselves are made of hardened steel (for hard woods) and softer steel for soft woods. They come in a variety of heights to reflect the wide variety of moulding thicknesses available. They commonly come in 7 mm, 10 mm, 12 mm and 15 mm heights.
The strength of a picture frame joint comes from two main factors – the choice of V-nail size and also the adhesive that holds the join together. It’s really a combined effect.
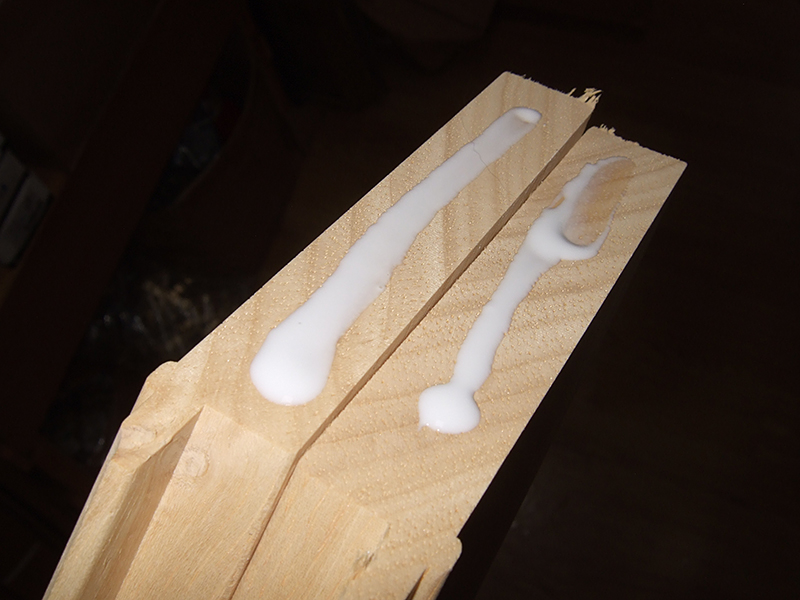
Wooden mouldings use PVA wood adhesive. Other types, like plastic mouldings, use other types of adhesive, eg fast bonding super glues.
To join a wooden frame moulding, the PVA glue is squeezed on to the mitred faces of wood. If these faces were joined like this, the glue would likely be squeezed up and onto the wooden face which is not desirable. This is especially so if you are using wood stains as the PVA leaves areas which resist wood stain penetration.
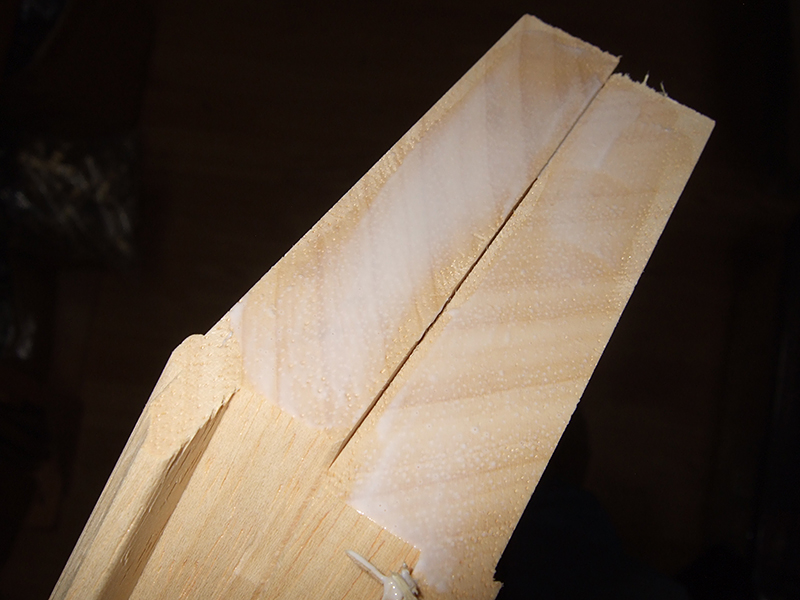
To prevent this, and to create a nicely bonded joint, it is best to spread the glue out smoothly and thinly on each face you are about to join, working the glue into the grain. You should also make sure to wipe any excess glue off before joining. This ensures an optimally glued joint and reduces the possibility of the PVA creeping onto the face of the frame.
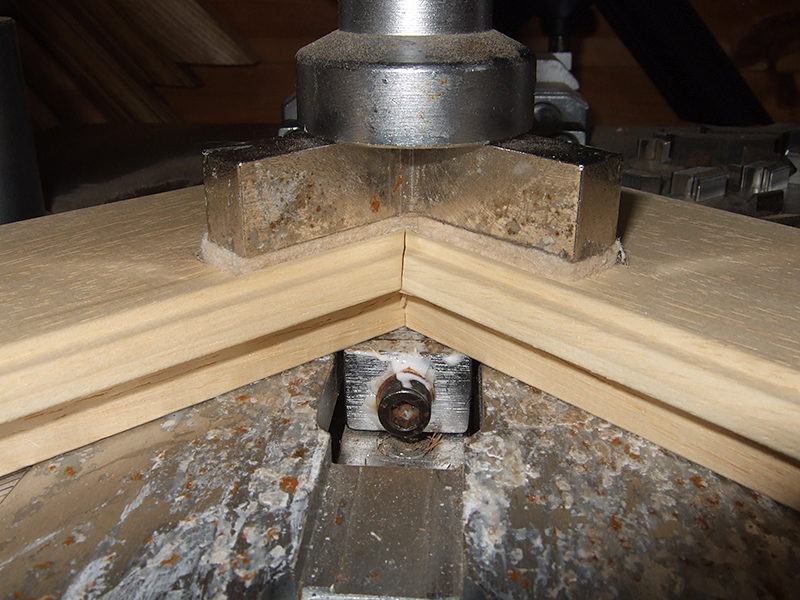
The mitre joints are now ready for the insertion of V-nails.
V-nail size is usually chosen based on the thickness of the moulding being used. A good rule of thumb is to choose a V-nail that goes somewhere between 2/3 and 3/4 of the depth of the moulding being used. If shorter V-nails are used, the joint may fail and start to open. If longer V-nails are used, you may actually punch through the front face of the frame, rendering it useless.
It is sometimes possible to use several different V-nail heights on one corner depending on the profile of the moulding. It is also possible with an underpinner to stack V-nails one on top of another, eg 2 x 10 mm V-nails go in to a 20 mm depth. This can provide some uses when you encounter deep rebate mouldings.
In this example I am using an Alfamachine minigraf underpinner to do the job. The V-nails are pushed up into the underside of the frame by a hardened steel head that is operated by a foot pedal. The upper cushioned pad descends and presses down firmly from above.
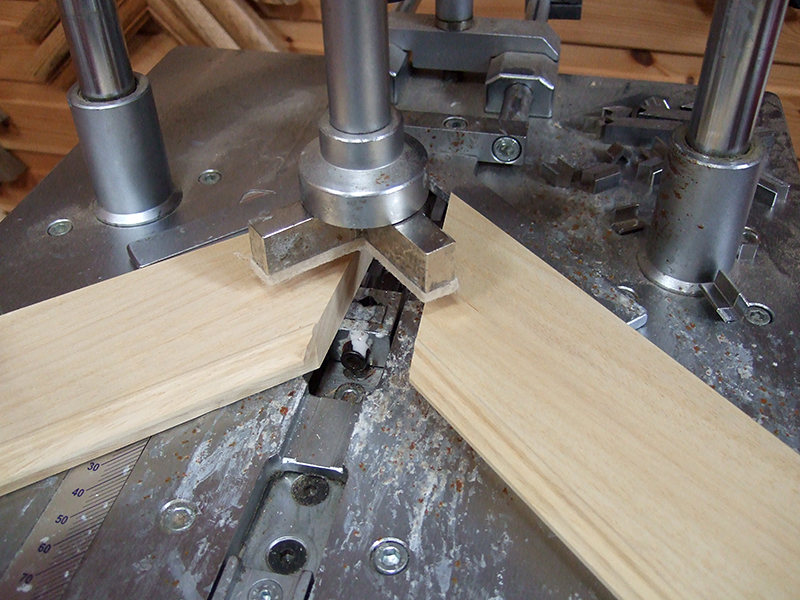
This process is repeated around every corner until the frame is completed. If you don’t have an underpinner, the hand tool pinners/underpinner versions can be used in conjunction with clamps or strap clamps to do the same task.
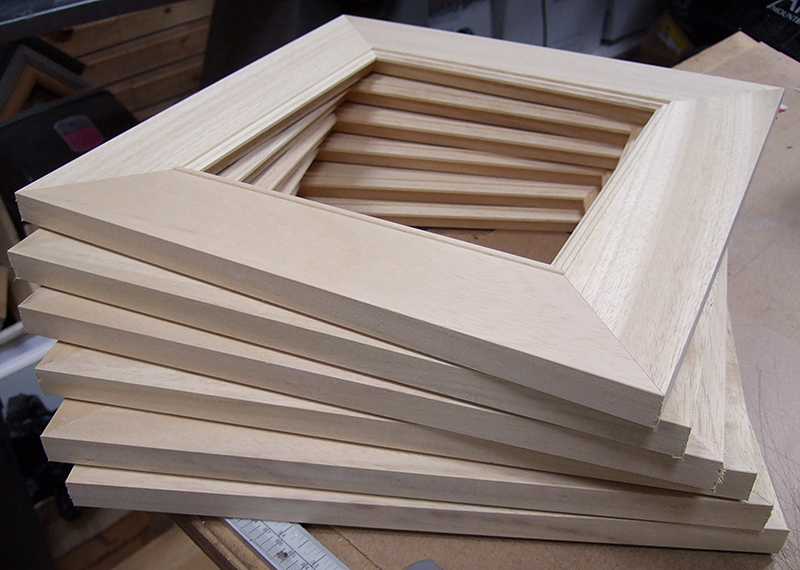
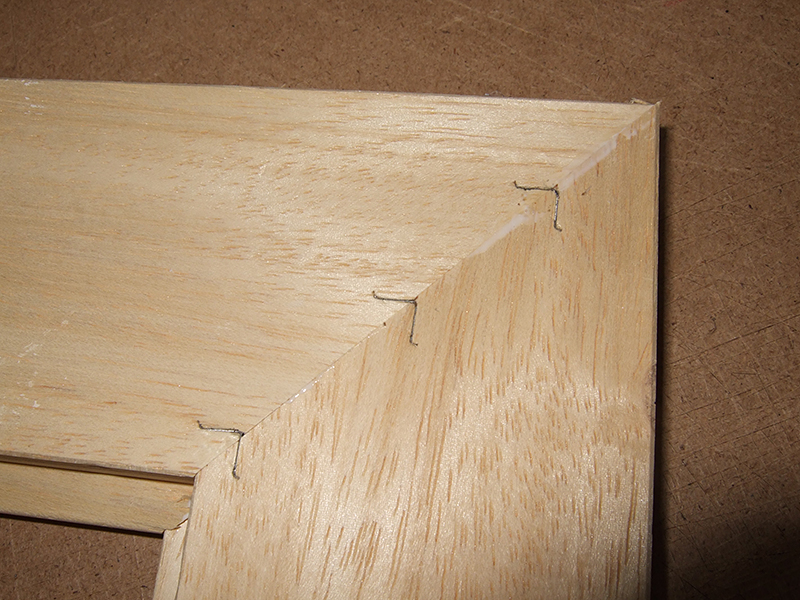
A pile of underpinned, assembled wooden frames can be seen in the first image of this page. For this particular moulding, I used single 15 mm V-nails at three spacings along the mitre.