A commonly asked question is what picture cord knot works best for hanging a picture frame? To answer this we first have to ask what are the desirable features of a picture cord knot?
The following are some desirable features of a picture knot –
Won’t untie (self tightening)
Won’t sag (so you can hang several pictures simultaneously in a line)
Will look neat and tidy (for a professional finish)
Won’t fray at the ends
Sagging can be minimised by using low stretch picture cord, you can then decide on the choice of knot.
One knot that meets the above criteria can be achieved as follows –
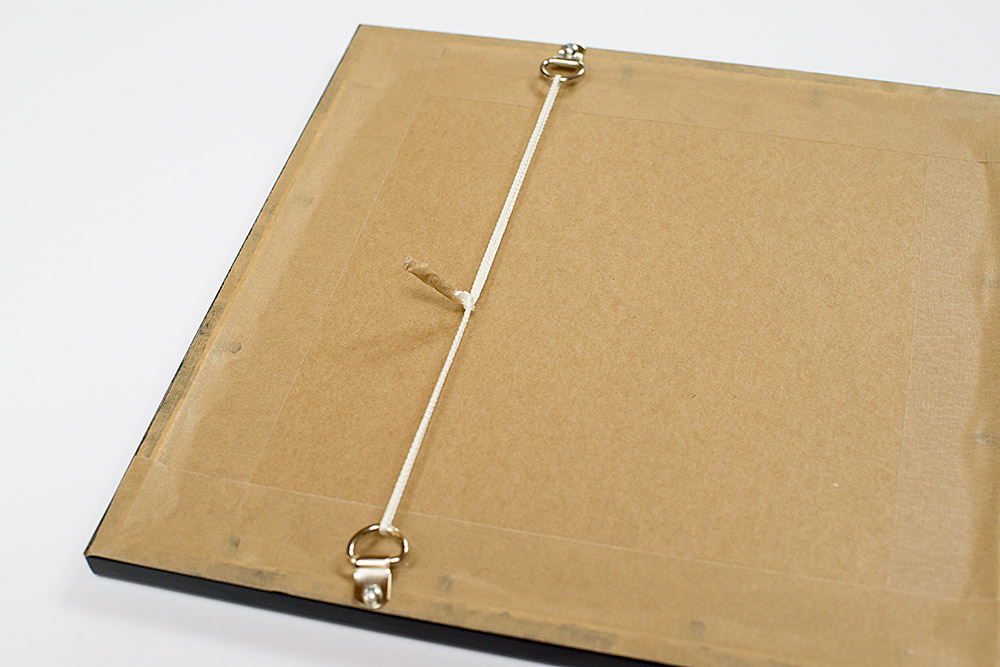
Attach D-Rings to back of frame (1/3 way down each side)
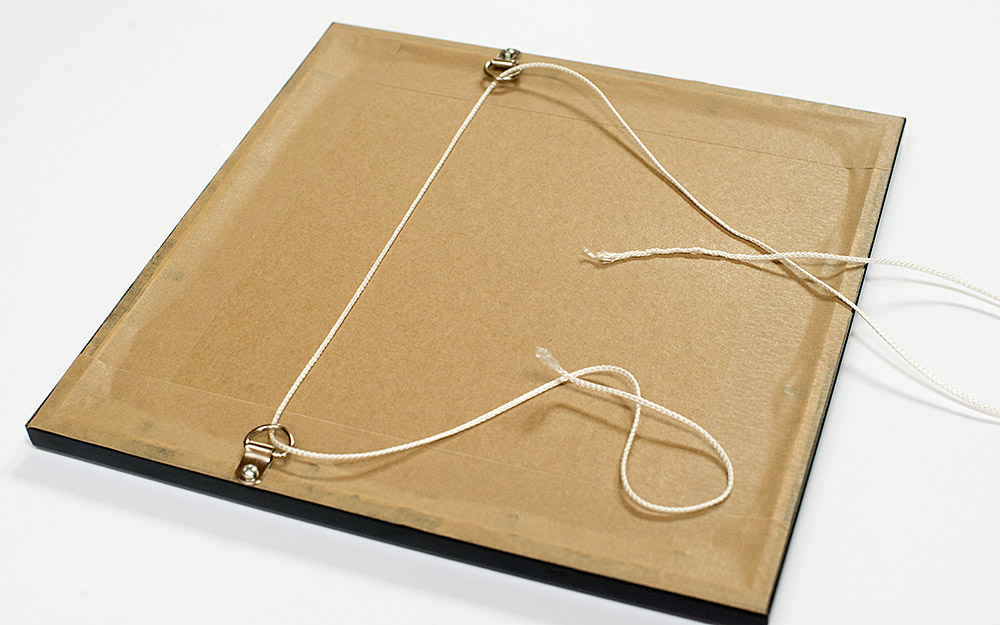
Cut cord to 3 x the width of the frame and feed cord through D-Rings as shown below –
Position the cord as follows –
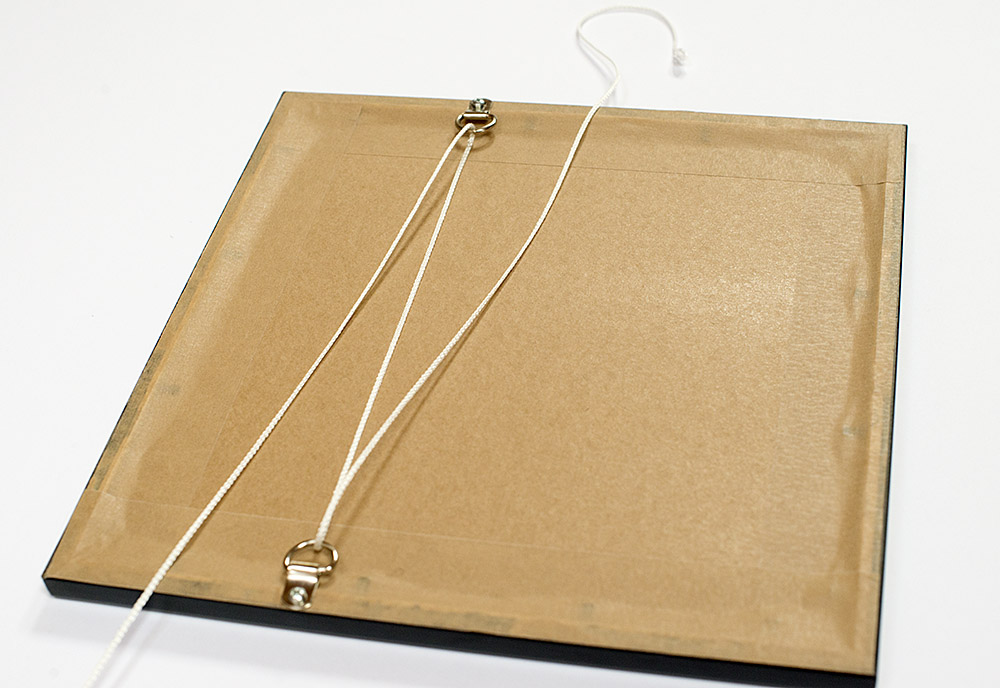
Arrange the cord like follows –
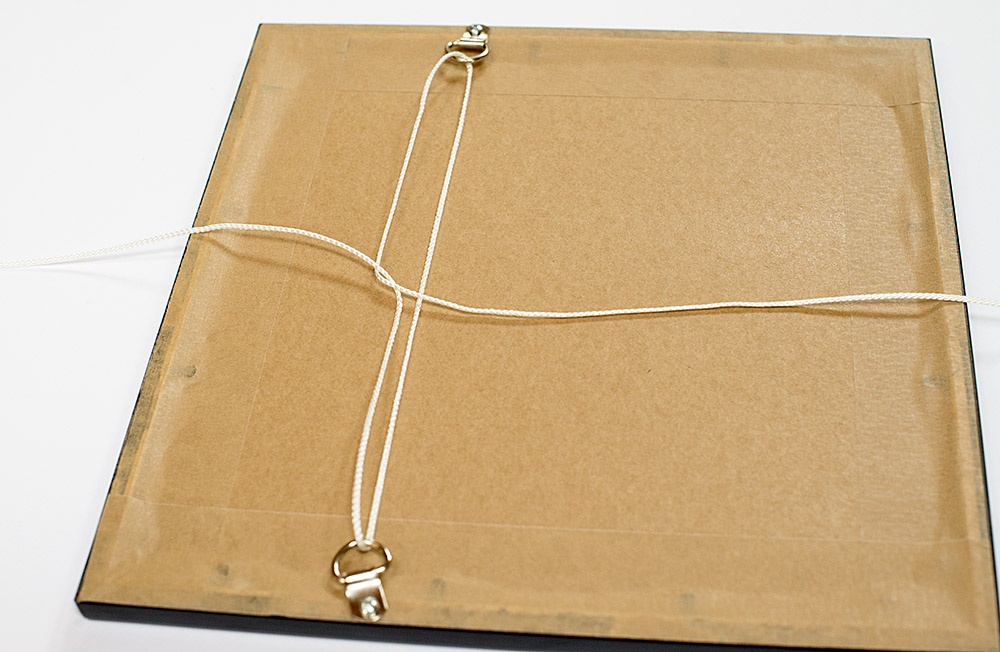
Loop the right hand side back under to the left side as shown below –
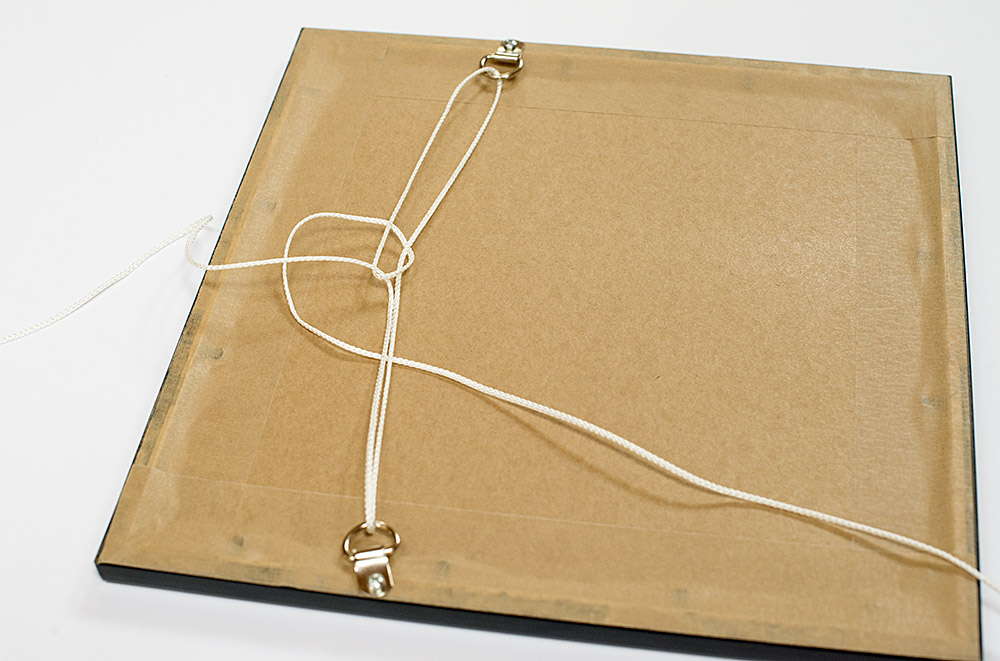
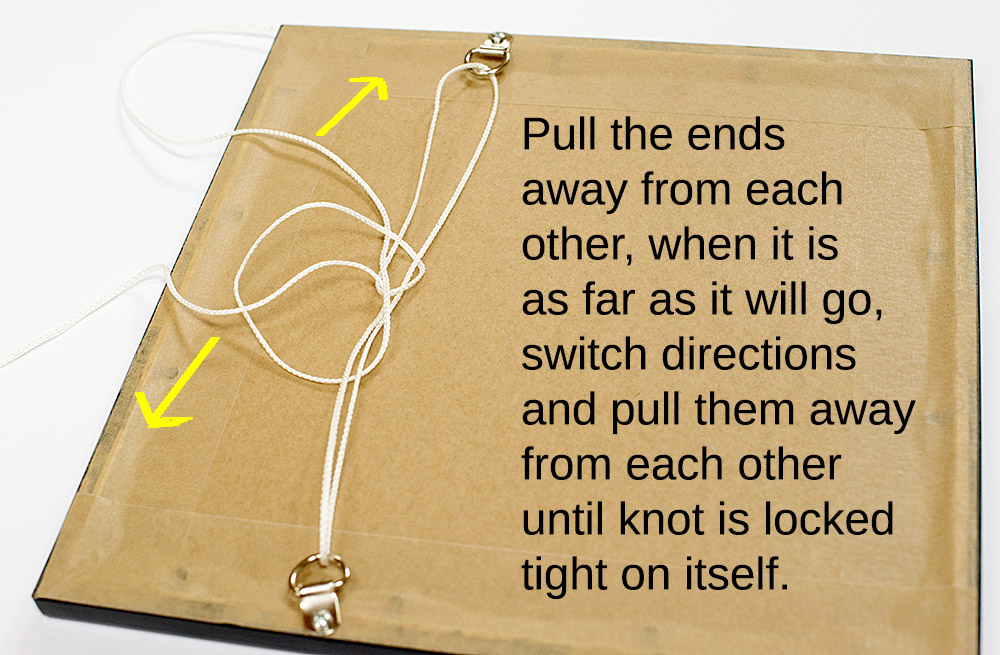
Feed the right hand end through the loop that you just created as shown below. Pull either ends of the cord away from each other until knot tightens, change directions of pulling by 1800 and pull again in opposite direction to tighten –
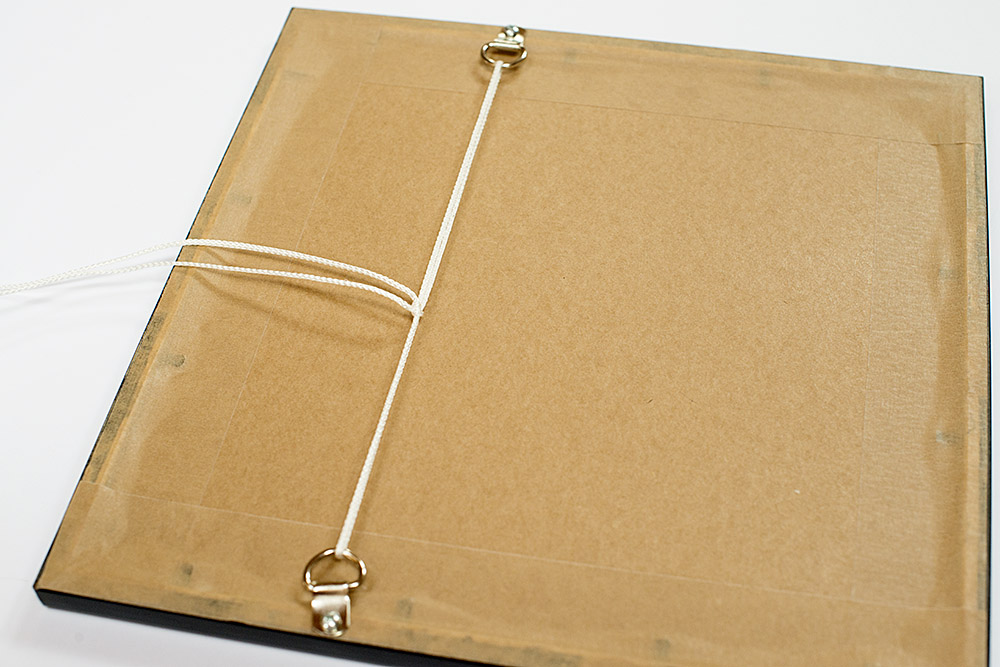
The knot and the cord should be tight, and not able to slip out or slacken –
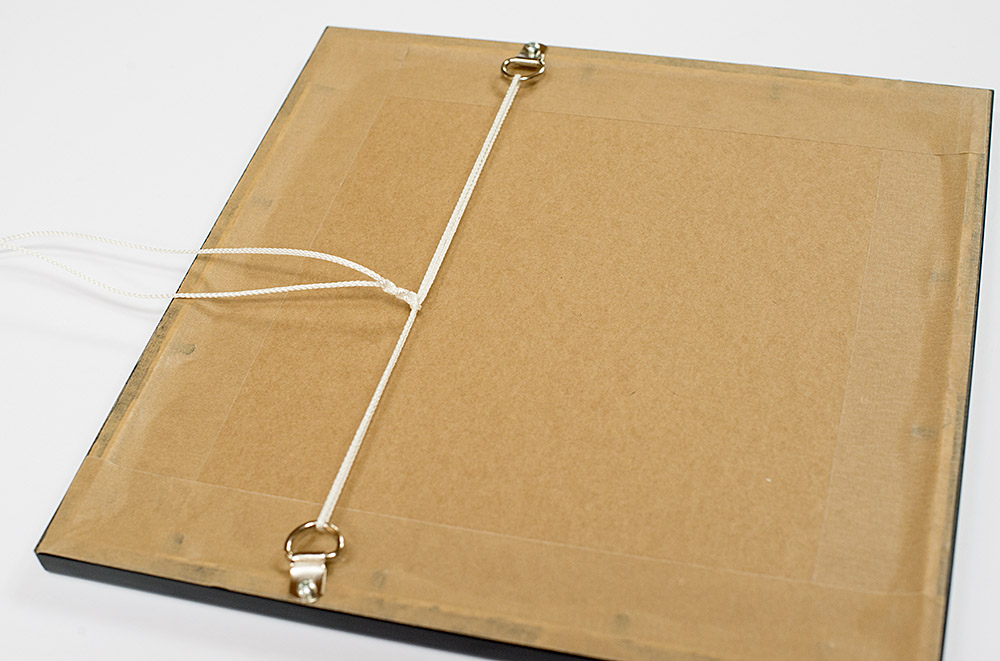
Tie a few ‘granny knot’ L over R, then R over L to secure the underlying knot –
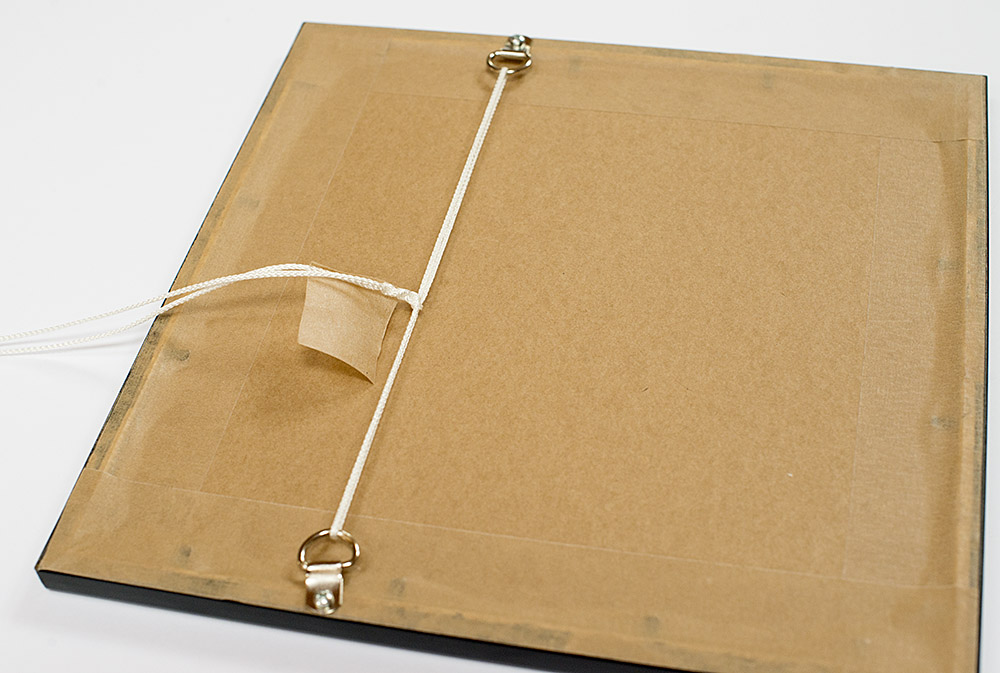
Secure by wrapping small piece of ECO-15 tape around the tied ends –
Use a craft knife to cut through the cord wrapped in ECO-15 tape –
The finished cord/knot combination should have a nice clean looking finish, and should provide a tight and secure cord to hang the picture via a picture hook on the wall –
Picture rails offer an easy way for you to hang pictures on a wall without the need for creating screw or nail holes for picture hooks. This can be useful when you want to frequently change the picture frames that are on display.
Picture rails can be made from wood, plaster and metal. Traditionally they are found in older properties with high ceilings.
Picture Rail Hooks are the most common method used for hanging a picture from a picture rail. The hooks come in a variety of sizes, styles and colours, but all generally do the same thing ie. provide an attachment hook for a cord, wire or cable to drop down for a frame to be attached to. Picture rail contours can vary so each will have a picture rail hook that work best with it in terms of size and shape.
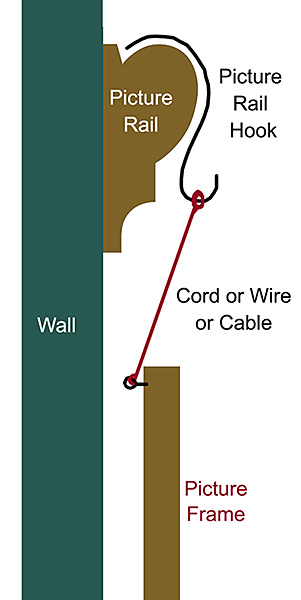
How to hang a picture frame from a picture rail with a picture rail hook
The diagram on the left shows how to hang a picture frame from a traditional style picture rail. The dimensions in the vertical direction have been compressed for indicative purposes. In reality the cord or wire can run much further down the wall.
A picture rail hook used with the picture rail allows you to create a suspended hook from the picture rail where you can attach a cord, wire or cable to. (The larger hooked end of the picture rail hook goes over the picture rail).
The suspended cord, wire or cable then attaches to the rear of the picture frame. This can be done using D-Rings or simple Screw Eyes screwed into the rear of the frame allowing the picture frame to be securely held.
Attachment of the cord closer to the top of the frame will hold the frame flatter to the wall which is good if the pictures will be displayed at eye level. Attachment of the cord closer to the middle of the frame will cause the frame to tilt forward, which is good if the pictures are to be hung above eye level.
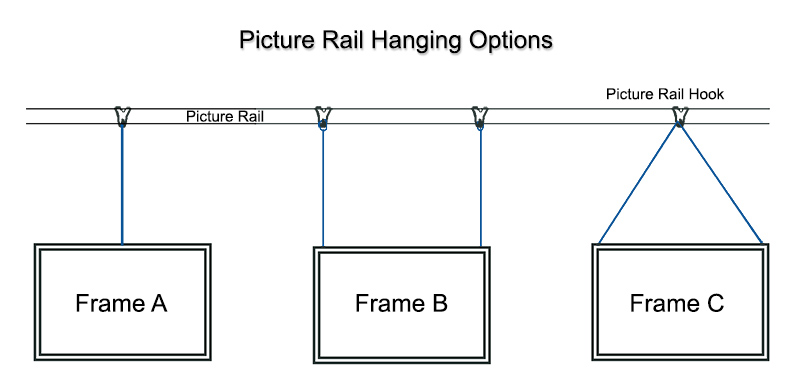
There are different ways to suspend your picture frame from a picture rail with cord or wire. The following diagram shows a few of these alternatives –
The choice can come down to aesthetic appearance, but lets discuss the merits of each method –
Frame A : Would likely require the frame to have a picture cord or wire strung between both sides of the frame with D-Rings or alternatively have some type of hanger attached at the top edge of the frame (could increase bowing of that frame edge). This option may prove difficult to hold position on the wall ie. it may need to be adjusted/straightened quite a lot. Another point to note is that the whole weight of the frame is placed onto one picture rail hook.
Frame B: This method has a more evenly distributed load over two points on the picture rail and picture frame. This method of hanging would likely require some adjustable secure hangers attached to the back of the frame and used in conjunction with the picture wire, cable or suspenders in order to fine tune position and straighten the picture. The whole weight of the frame will be evenly distributed between the two picture rail hooks as well as two points on the frame.
Frame C: This method is by far the easiest option to use. It has only has one connection with the picture rail, but allows easy adjustment of the angle that the frame hangs at. Only one length of cord or wire is used, with no requirements for knots or loops on the picture rail hook. However, the whole weight of the frame is placed on one picture rail hook. The cord can be attached to each side of the frame back with Screw Eyes or D-Rings.
Sometimes you may find yourself using a moulding that is just way too narrow to attach a screw and D-Ring to. If you do, the rounded edge of the D-Ring can end up being visible from the front of the frame when hanging on the wall, which isn’t pleasant to look at.
One alternative is to continue to use D-Rings but instead of screwing the D-Rings to the frame, you can attach the D-Rings to the backing board by using Bifurcated Rivets. This is method I’d recommend for lighter frames only as there is a finite strength to MDF backing boards. The Bifurcated Rivets come in both nickel plated and brass plated finishes and require no specialised hardware to fit (a ruler, pencil, bradawl, screwdriver and hammer will suffice).
The procedure for attaching them to the backing board is as follows –
1. Select a backing board at least 2mm thick MDF. (a relatively solid material). Mark the two points where the rivets are going to go (about 1/3rd way down from top and about 30mm in from sides)
2. Use a bradawl to punch holes through the MDF at your measured points. make the holes close to 3mm in size – just wide enough so as to allow the bifurcated rivets to push through.
3. Push the rivet through the hole of the D-Ring and then through the hole you have made in the MDF.
4. Turn the MDF over to see the rivet protruding from the other side of the board. Place the D-Ring and Rivet head on an old wooden off cut, and place a screwdriver over gap in the rivet legs.
5. Hit the screwdriver shaft with a hammer to start to splay the rivet legs.
6. Take away the screwdriver and splay the rivet further apart with a hammer. Flattening the rivet legs against the board. If you are not using a barrier board between the backing and the artwork, then at this stage you should tape over these ends as they may push against the artwork (which is really not desirable). I recommend using a mount board or similar barrier layer of acid free board between the artwork and the backing board.
7. Repeat with other D-Ring.
8. Assemble the frame and finish tying picture cord between the two D-Rings. Congratulations the picture frame is now ready to hang.