Pictures are most commonly hung using a pair of D-Rings screwed onto the back of the each side of wooden (or plastic) picture frame. They provide attachment point loops that picture cord or wire can be then be strung between. The cord or wire can then be used to hang the frame from a picture hook (nail, screw or similar) that is attached to the wall.
Single hole D-Rings are the most basic form of hardware for this purpose. They are useful for most frames up to about 0.5m wide. Wider than 0.5m but < 1m or when using a heavier frame/moulding, then double D-Rings are advised, they are more robust than single D-Rings and have two screw holes.
The Procedure for attaching D-Rings to a picture frame –
Apply frame backing tape around each back edge for the frame/backing board to seal the frame from dust mites and dampness.
Measure approximately 1/3 of the distance down on one side of the frame and mark with pencil/pen. Measure down the other side the exact same distance and mark again.
Use a bradawl to poke a small hole into the frame backing at this mark on each side, this will provide a start for the screws.
Line up the D-Rings and screw with the pre started holes and screw the D-rings into place. The D’s (loops) of the D-Rings should be facing each other.
Tie a cord between each D-Ring and secure with a knot. Alternatively, wire and ferrules can be used instead.
Finish the cord ends off with a bit of frame backing tape to stop them fraying.
Picture frames require precision cutting to achieve 45° mitred edges. This process is usually achieved by using a guillotine, which leaves perfectly smooth 45° edges.
The next step is to accurately join the four equal mitred edges together to form the frame.
Traditionally, this used to be done by hammering picture framing pins in from the sides of the frame and was not the most efficient way of creating perfect joins. You sometimes come across very old frames that have been joined this way and, although they have lasted a long time, their corners usually show gaps. Sometimes those gaps can be large as well as dangerous looking!
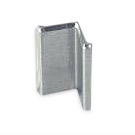
V-nail
The industry standard method for joining picture frame corners these days is to use V-Nails (“V” shaped nails) to join the 45° corners together.
The V-nails have one sharp ‘V’ and one blunt ‘V’ end. The sharp end gets pushed into the 45° mitre wood corners. They are also designed to pull the joints together when inserted.
The industry uses underpinners to insert V-nails, and smaller types of over/under pinner are available for the hobby/enthusiast markets which do an equally good job, albeit perhaps at a slower pace.
V-nails themselves are made of hardened steel (for hard woods) and softer steel for soft woods. They come in a variety of heights to reflect the wide variety of moulding thicknesses available. They commonly come in 7 mm, 10 mm, 12 mm and 15 mm heights.
The strength of a picture frame joint comes from two main factors – the choice of V-nail size and also the adhesive that holds the join together. It’s really a combined effect.
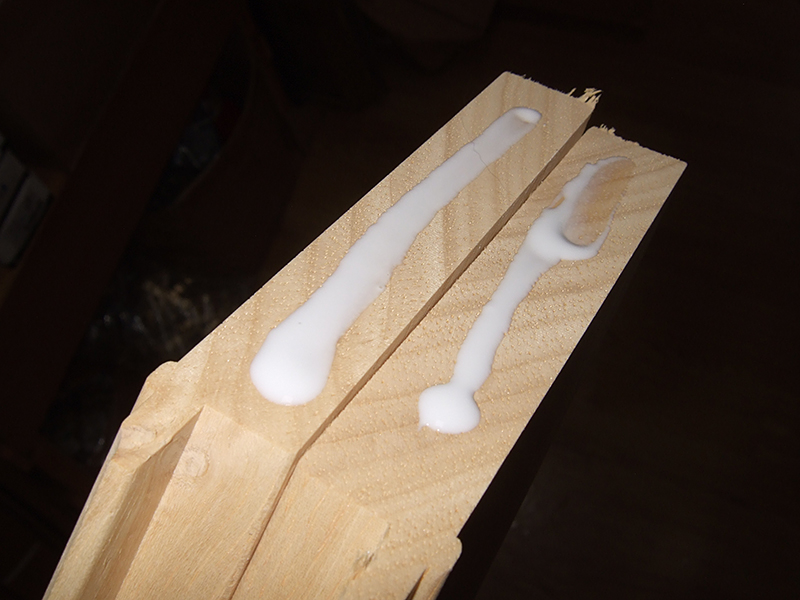
PVA glue squeezed onto mitred joints of frame.
Wooden mouldings use PVA wood adhesive. Other types, like plastic mouldings, use other types of adhesive, eg fast bonding super glues.
To join a wooden frame moulding, the PVA glue is squeezed on to the mitred faces of wood. If these faces were joined like this, the glue would likely be squeezed up and onto the wooden face which is not desirable. This is especially so if you are using wood stains as the PVA leaves areas which resist wood stain penetration.
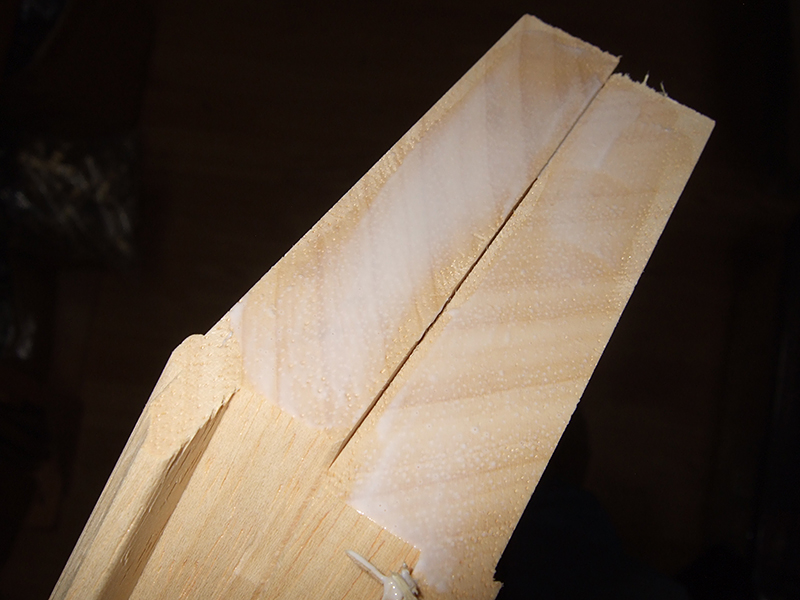
Smoothed PVA glue spread evenly on the surfaces.
To prevent this, and to create a nicely bonded joint, it is best to spread the glue out smoothly and thinly on each face you are about to join, working the glue into the grain. You should also make sure to wipe any excess glue off before joining. This ensures an optimally glued joint and reduces the possibility of the PVA creeping onto the face of the frame.
The mitre joints are now ready for the insertion of V-nails.
V-nail size is usually chosen based on the thickness of the moulding being used. A good rule of thumb is to choose a V-nail that goes somewhere between 2/3 and 3/4 of the depth of the moulding being used. If shorter V-nails are used, the joint may fail and start to open. If longer V-nails are used, you may actually punch through the front face of the frame, rendering it useless.
It is sometimes possible to use several different V-nail heights on one corner depending on the profile of the moulding. It is also possible with an underpinner to stack V-nails one on top of another, eg 2 x 10 mm V-nails go in to a 20 mm depth. This can provide some uses when you encounter deep rebate mouldings.
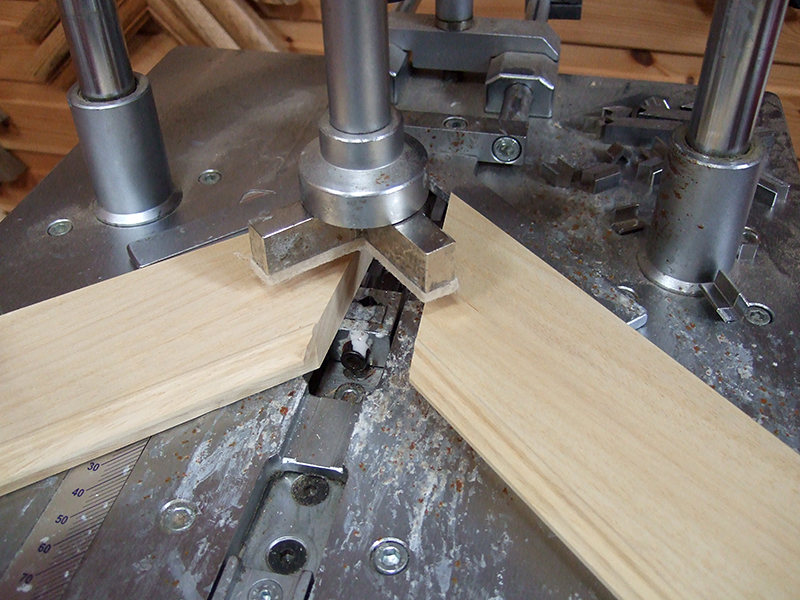
In this example I am using an Alfamachine minigraf underpinner to do the job. The V-nails are pushed up into the underside of the frame by a hardened steel head that is operated by a foot pedal. The upper cushioned pad descends and presses down firmly from above.
Frame mitred joints on underpinner
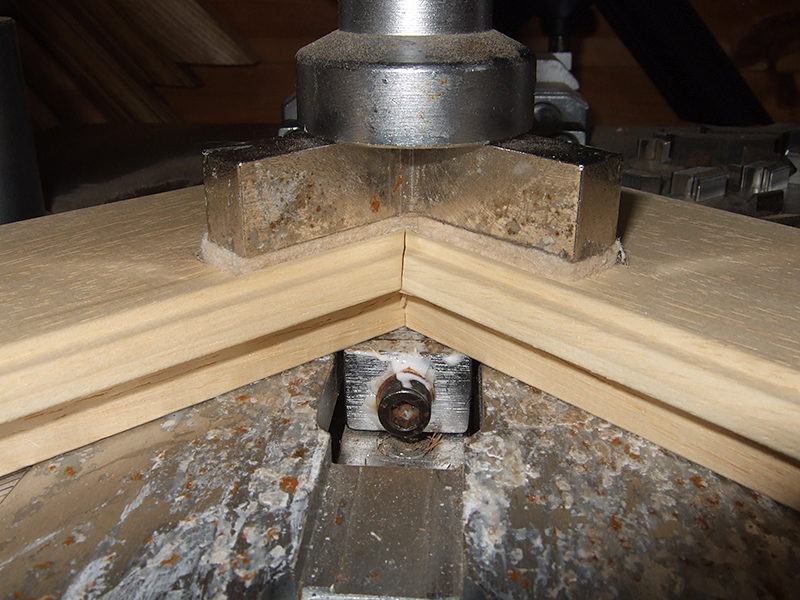
Underpinner firing V-nail with felt clamp pushing down from above.
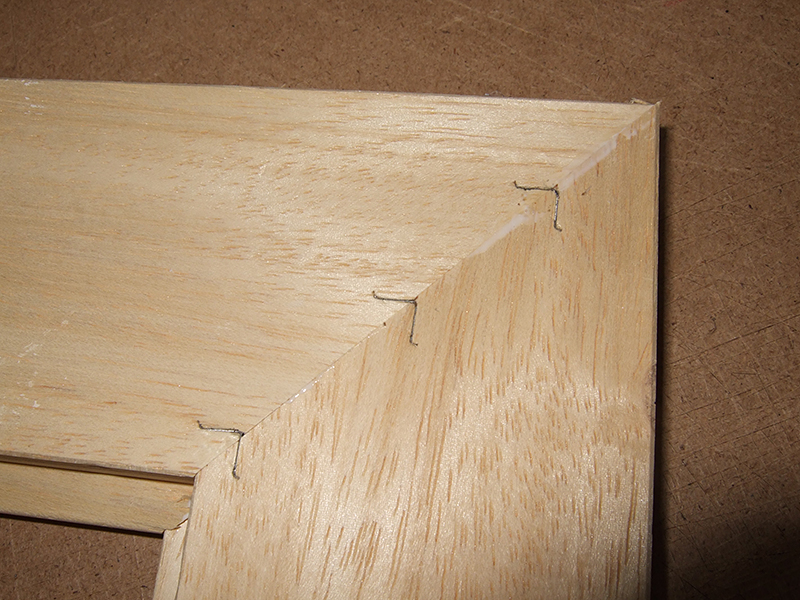
Back of frame showing mitre join with V-nails
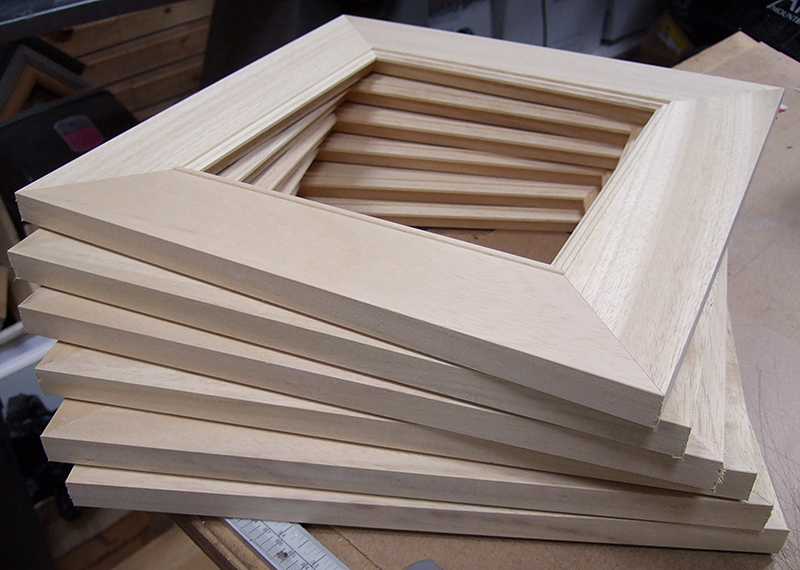
This process is repeated around every corner until the frame is completed. If you don’t have an underpinner, the hand tool pinners/underpinner versions can be used in conjunction with clamps or strap clamps to do the same task.
A pile of underpinned, assembled wooden frames can be seen in the first image of this page. For this particular moulding, I used single 15 mm V-nails at three spacings along the mitre.
I recently had the opportunity to confront head on an issue that had become apparent while cleaning some ageing 2mm float glass. It made me explore the possibilities as well as finding a solution!
The problem : the 2mm float glass that is commonly used in picture framing is normally supplied in a bulk quantity to the picture framing shop. Bulk can be upwards of 50-100 sheets at a time, which is difficult heavy work to shift all at once. The glass is supplied usually in 1.2m x 0.92m size sheets. They come with a large piece of very thin white paper sandwiched between each glass sheet which offers some scratch protection during transport.
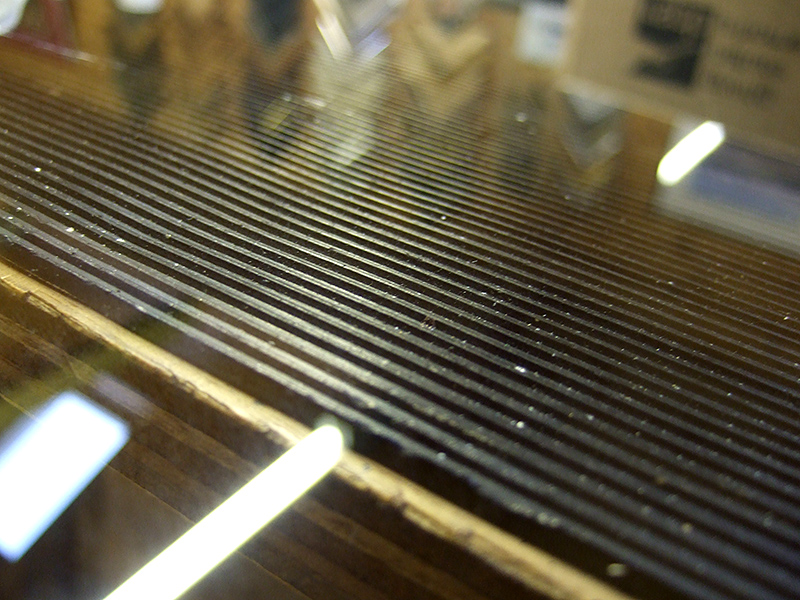
Glass mottling from paper residue (click image to enlarge)
The downside to having these sheets of thin white protection paper is that they are very susceptible to moisture ingress and if not immediately stored in a non damp environment can themselves wick moisture up into the face of the glass sheets leaving a residue on the glass surface. The residue looks like a very faint mottling effect. It is also almost invisible unless viewed at an angle under artificial lighting conditions.
This residue has proven very problematic to remove, resistant to just about every common glass cleaner, and a glass supplier once told me, “Once it’s there, nothing can take it off”. Up until this week, I believed him!
Having received a large delivery of glass quite some time ago, and having chosen to store it in a convenient but slightly damper environment, I proceeded to immediately remove all of the paper from between the sheets when it first arrived. I erroneously though that this would take care of the issue, but now that I’m coming to the end of the supply, I have found that this same glass mottling effect is still prevalent despite the absence of the paper. I can deduce from this that the paper must leave some residue on the glass which remains even after it has been removed. This lingering residue then appears to react to dampness which hardens into the slightly visually mottled effect, resembling a faint “etched” like appearance.
I had previously found no glass cleaner that could clean it. I was convinced it was surface contamination rather than an actual ‘etching’ effect, because I found that you could actually remove some of it with a flat sharp blade. I found that this worked even better when the blade was combined with some glass cleaner as a lubricant. However using the blades could have the downside of leaving hairline scratches on the glass which is a non-starter with picture framing. I had to find another solution to clean these sheets or risk having to throw them out completely.
To start with, I identified that the mottling effect was only happening on one face of the glass. This I surmised was likely due to the paper surfaces having one face different from the other, and one side being prone to leaving the residue. I then tried a few different methods of removal listed in the table below along with the outcomes –
Methods tested
Results
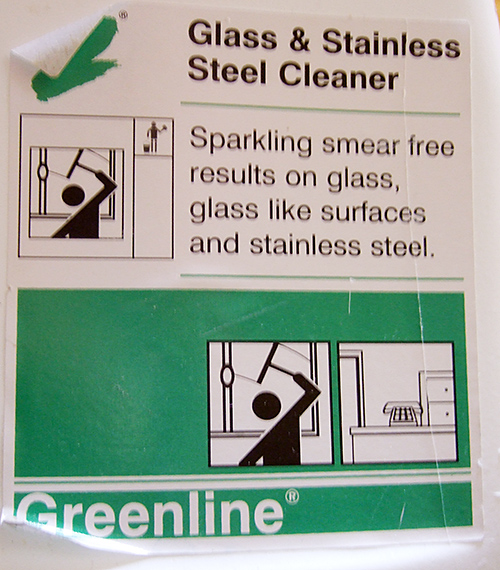
Greenline Glass and Stainless Steel cleaner
No visible removal of mottling
Greenline Glass and Stainless Steel cleaner + mount cutter blade surface scape
Partial or whole removal of mottling but with risk of fine glass scratches and slight streaking.
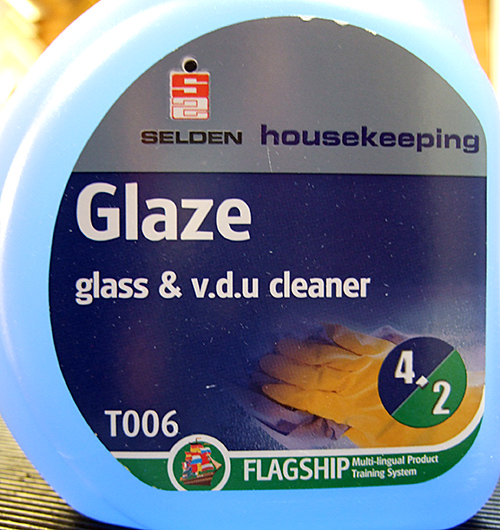
Selden Glass & VDU cleaner
No visible removal of mottling
Mr Muscle Window and Glass cleaner
No visible removal of mottling
Zest-it solvent
No visible removal of mottling
Tesco White Wine vinegar
Used raw, undiluted led to immediate removal of surface mottling, although sometimes required a light second finishing wipe. Then cleaned with a final standard ph-neutral glass cleaner clean afterwards.
As you can see, the only really reliable approach was found using one of the oldest known glass cleaning substances – undiluted vinegar and kitchen roll. The effect was immediate and repeatable with clean kitchen roll used to wipe it off.
Cleaned glass ready for picture frame (click to enlarge image)
Now this raises another issue in that vinegar is essentially acetic acid with water, and has a ph of 4-5 (acidic). It also has the usual pungent vinegar smell, which is hardly going to appeal to anyone picking up a picture frame!
To avoid leaving acidic residues which could in turn affect the longevity of the mount and artwork, I gave the glass a thorough dry before applying two coats (and clean off) with my regular glass cleaner which has a more ph-neutral rating and a much less pungent smell.
Top tip: If you have to use this technique to clean your glass, just remember to clear away all the vinegar soaked kitchen towels as well as the vinegar bottle before the customers arrive to pick their frames up, other wise they might just think they turned up at the local chip shop!
 Pictures are most commonly hung using a pair of D-Rings screwed onto the back of the each side of wooden (or plastic) picture frame. They provide attachment point loops that picture cord or wire can be then be strung between. The cord or wire can then be used to hang the frame from a picture hook (nail, screw or similar) that is attached to the wall.
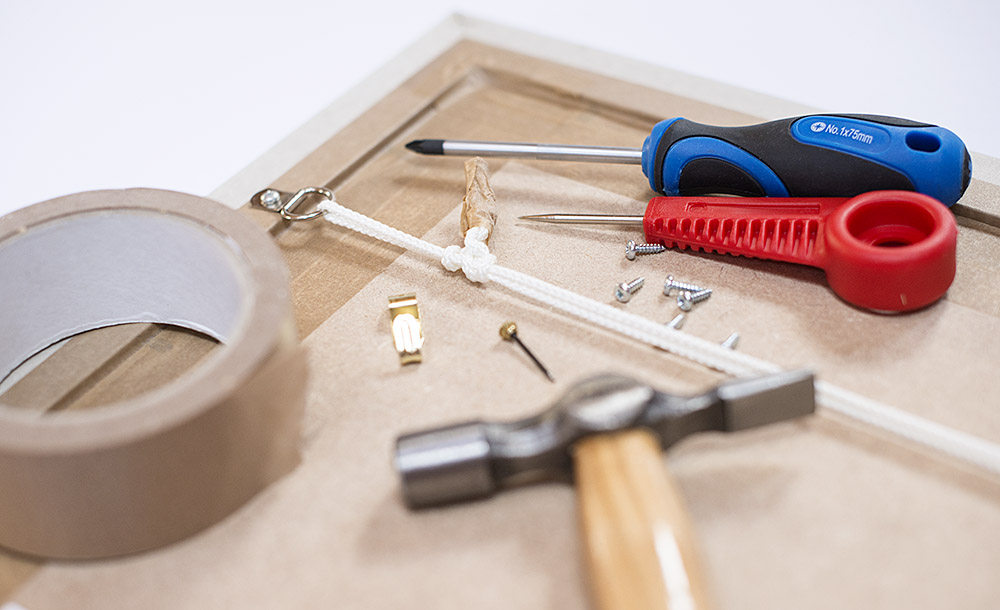 Hardware required –