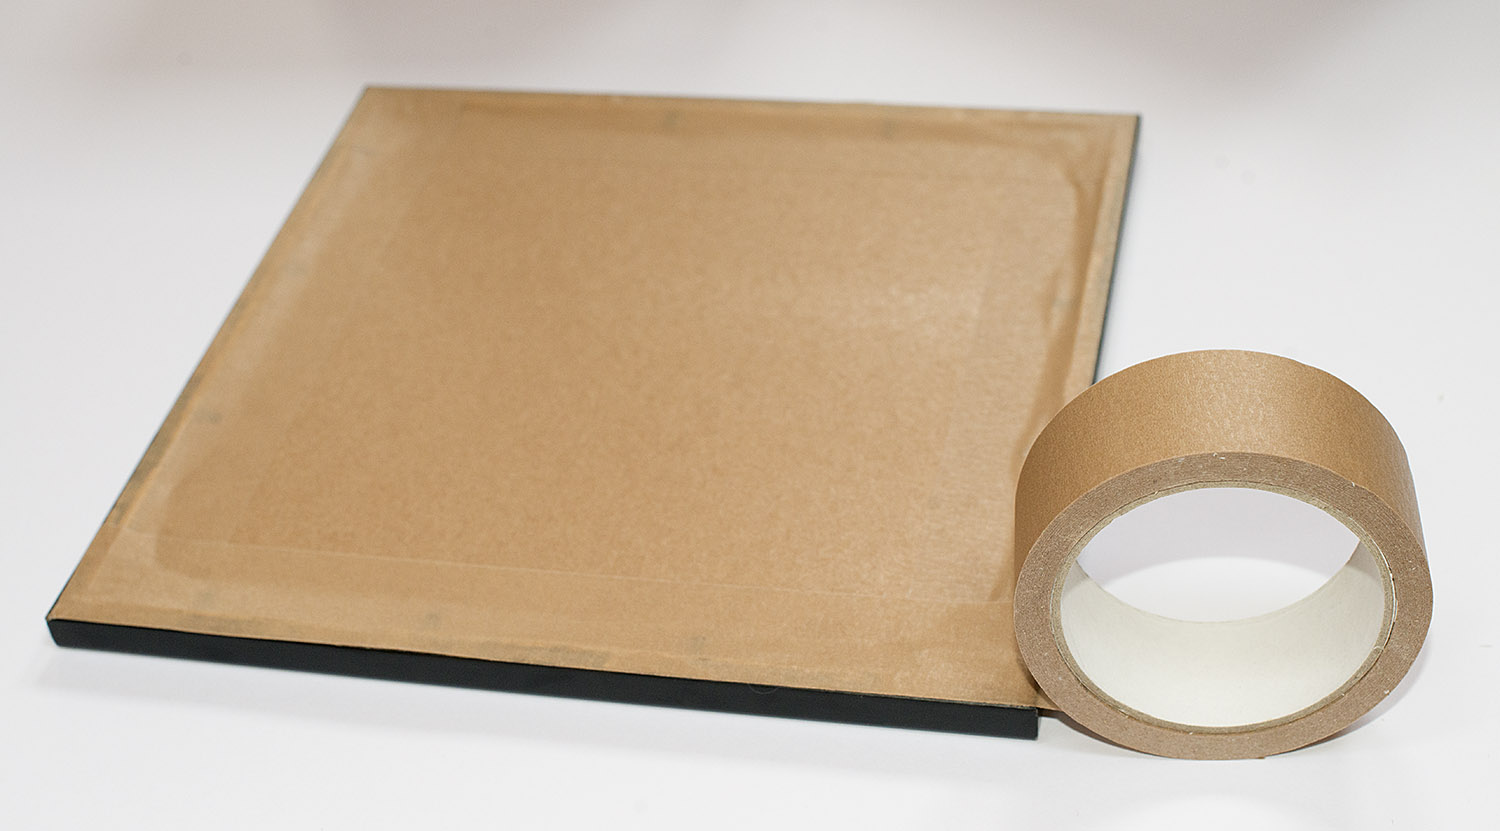
This how to guide shows how you seal and finish the back of a picture or photo frame prior to hanging or selling.
The purpose of finishing the back of a frame is to –
Seal it to prevent dust, mites and damp from entering the mount/artwork/under the glass
Make it appear professional and neat to the eye
Provide hanging points to hang the picture
Provide stability from motion and wall protection
The assumption in this article is that you already have a picture frame either custom made or pre-made with glazing, mount and backing board cut to size and attached. The backing board should also be able to provide some degree of moisture protection eg aqua board or similar.
The methodology for finishing the back of a picture frame is as follows –
Step 1 :
Secure the backing board, mount, artwork, and glazing ‘sandwich’ in to frame rebate with flexi points, semi rigid points or other similar framer’s points and tabs. these can be fired in with a tab gun or manually pushed in.
Step 2 :
Use a picture frame backing tape like self adhesive ECO-15 or ECo-25 tape on each edge to make the dust seal. Trim the tape with a craft knife after completing each side, being careful not to damage the side of the frame.After taping and trimming the tape edge on all four edges it should look like this –
Step 3 :
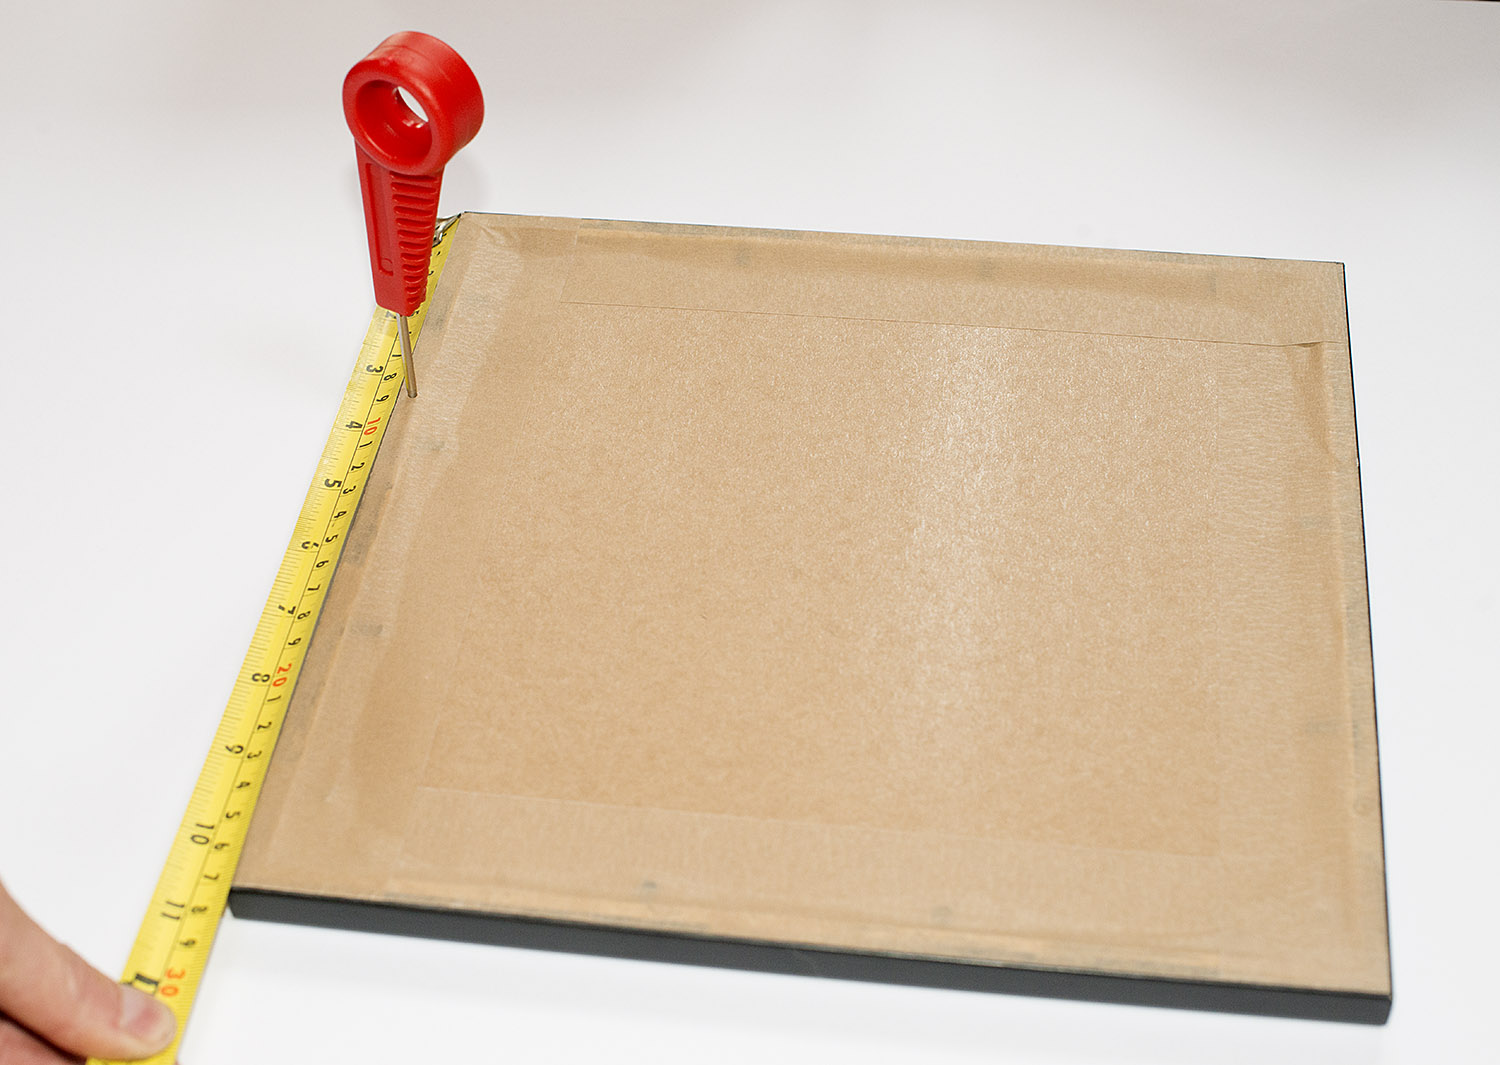
Measure the sides of the frame 1/3 of the way down from top edge, mark with a pencil or bradawl, then create a shallow starting hole in the frame with the bradawl. Repeat on other side of frame so you have two matching holes for starting a screw thread on each side of the frame moulding.
Step 4 :
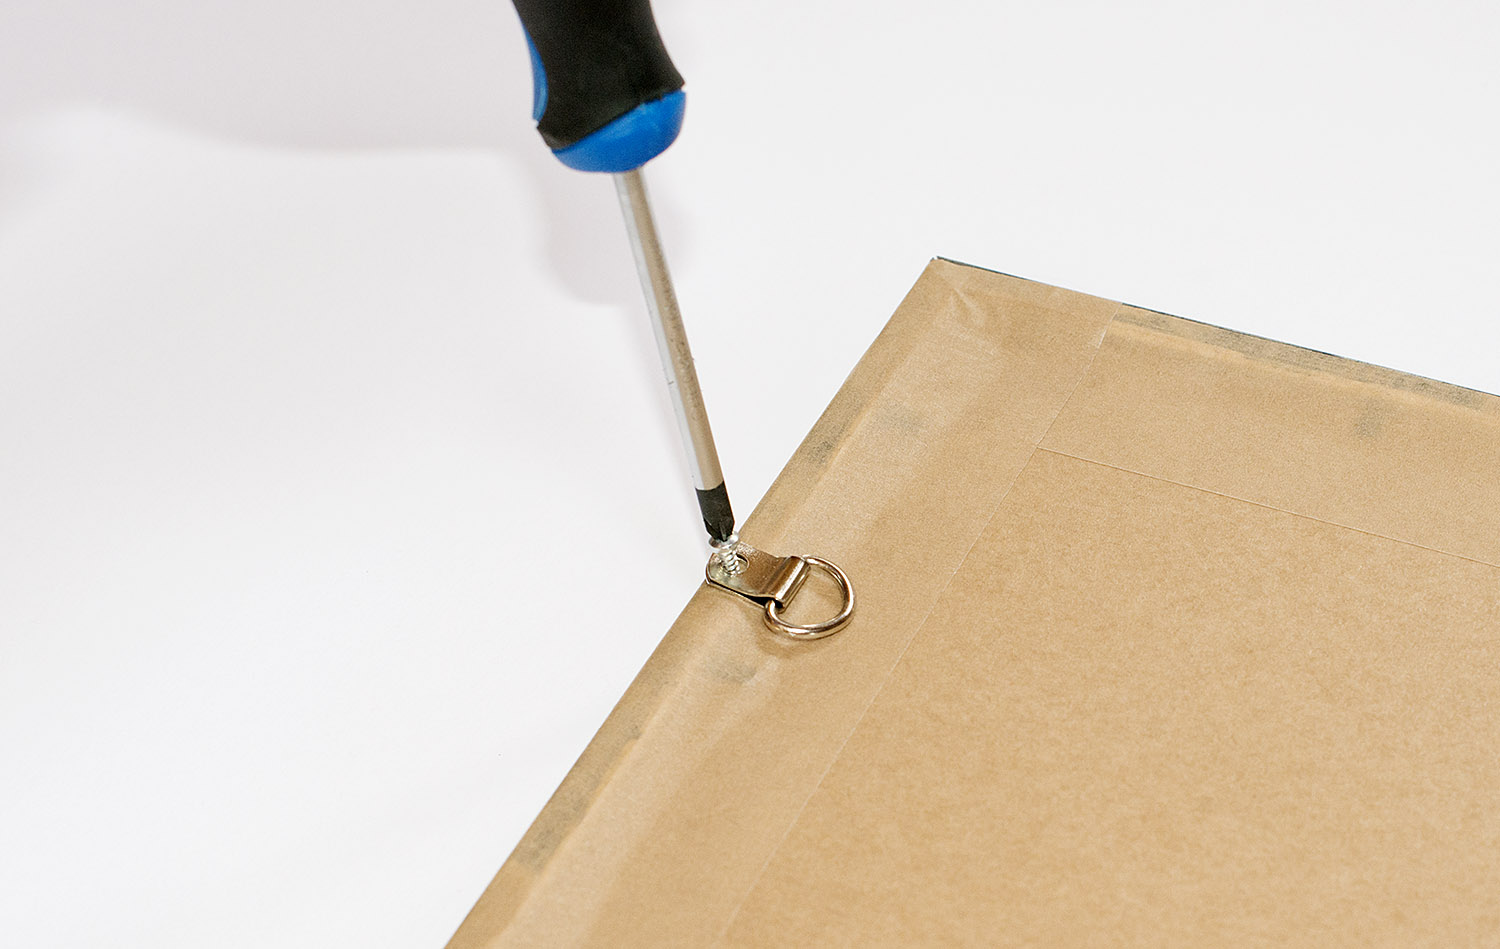
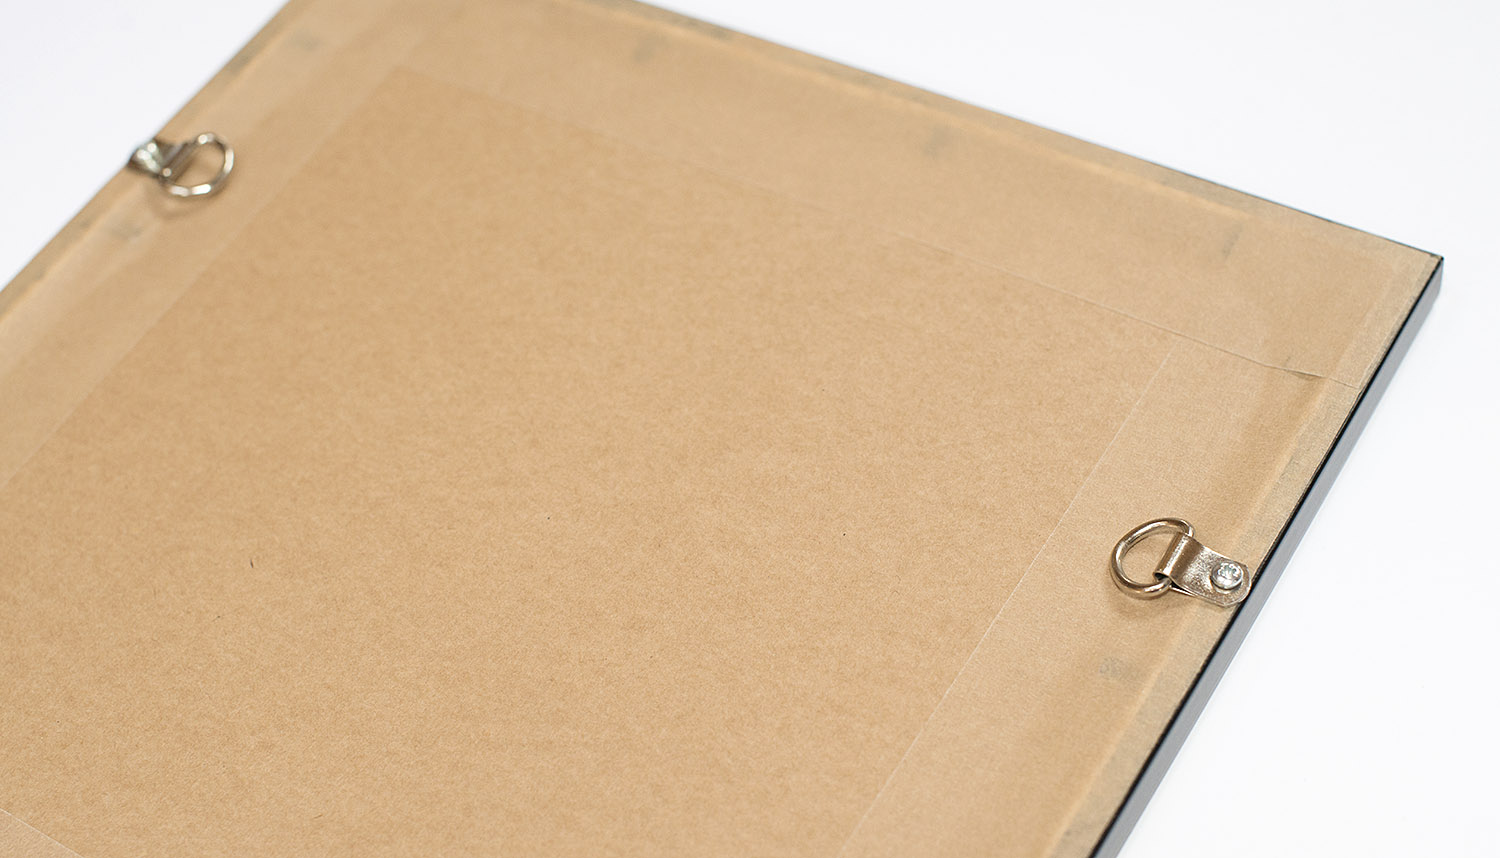
Attach a D-Ring to each side of the frame using a pan headed screw to hole it in place.
Step 6: Attach two felt or other similar bumper pads to each lower corner of the frame. This will help stop the frame moving on the wall as well as help prevent the frame from marking the wall. It will also create an air gap and allow air to circulate behind the frame.
The picture frame backing process is complete and it’s time to hang your picture on the wall!
A commonly asked question is what picture cord knot works best for hanging a picture frame? To answer this we first have to ask what are the desirable features of a picture cord knot?
The following are some desirable features of a picture knot –
Won’t untie (self tightening)
Won’t sag (so you can hang several pictures simultaneously in a line)
Will look neat and tidy (for a professional finish)
Won’t fray at the ends
Sagging can be minimised by using low stretch picture cord, you can then decide on the choice of knot.
One knot that meets the above criteria can be achieved as follows –
Attach D-Rings to back of frame (1/3 way down each side)
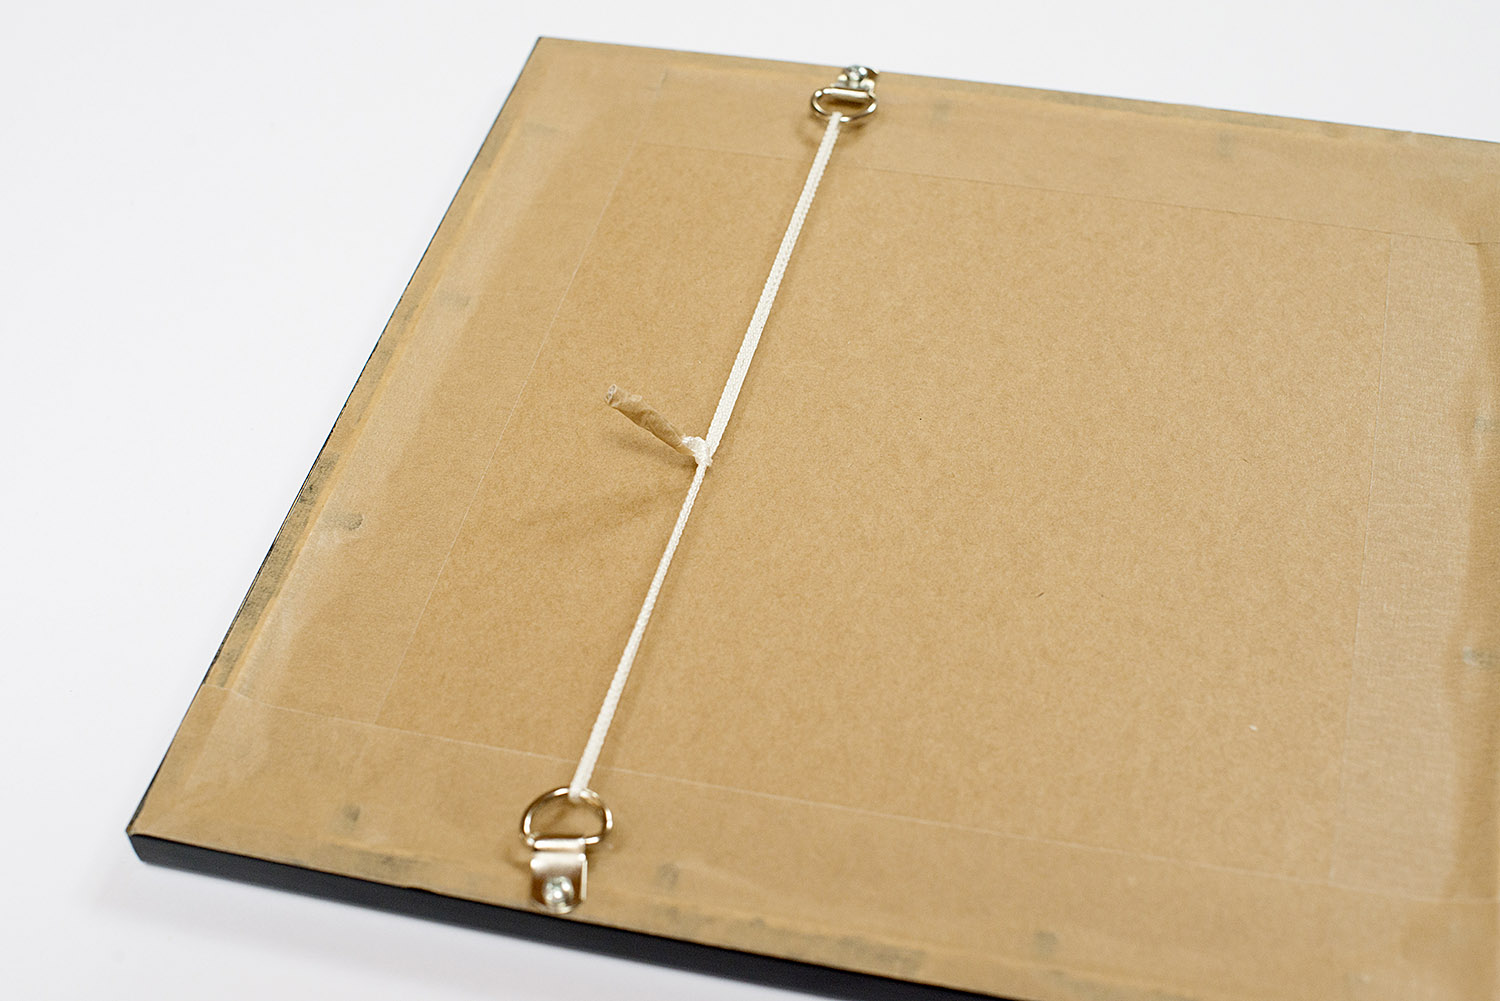
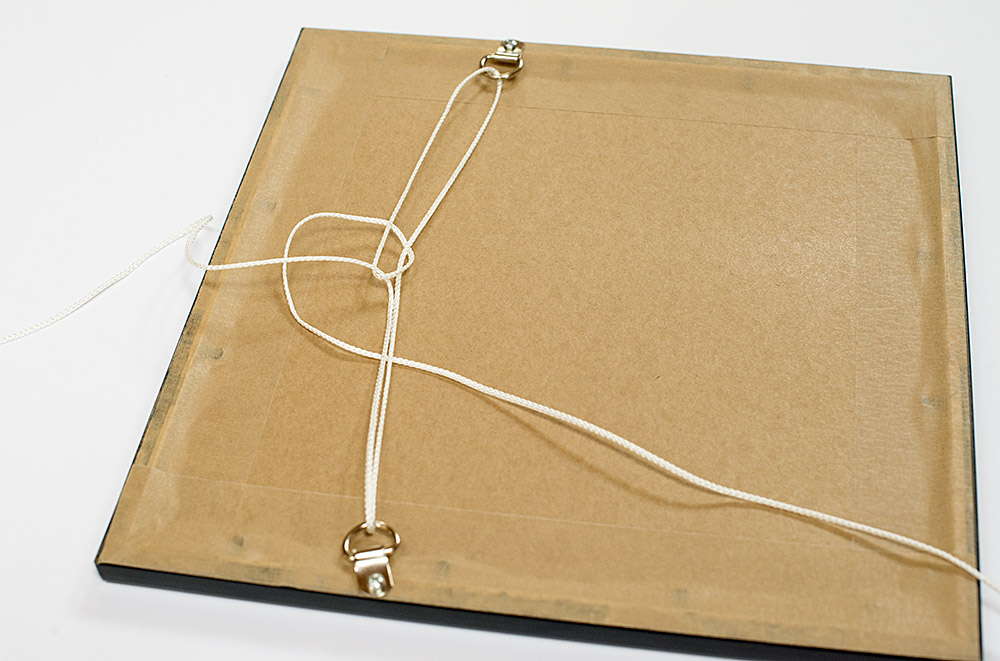
Cut cord to 3 x the width of the frame and feed cord through D-Rings as shown below –
Position the cord as follows –
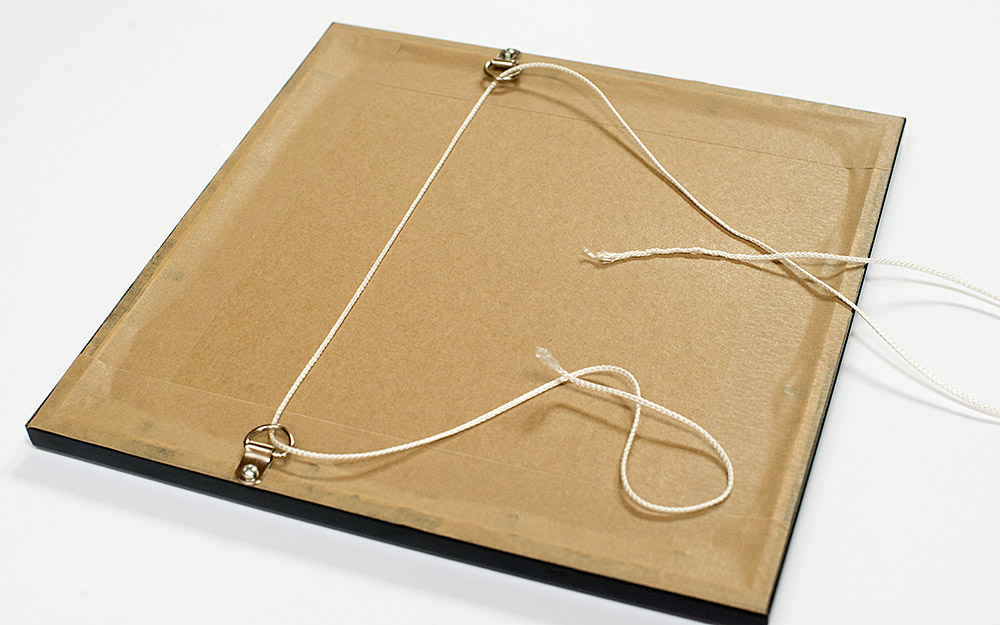
Arrange the cord like follows –
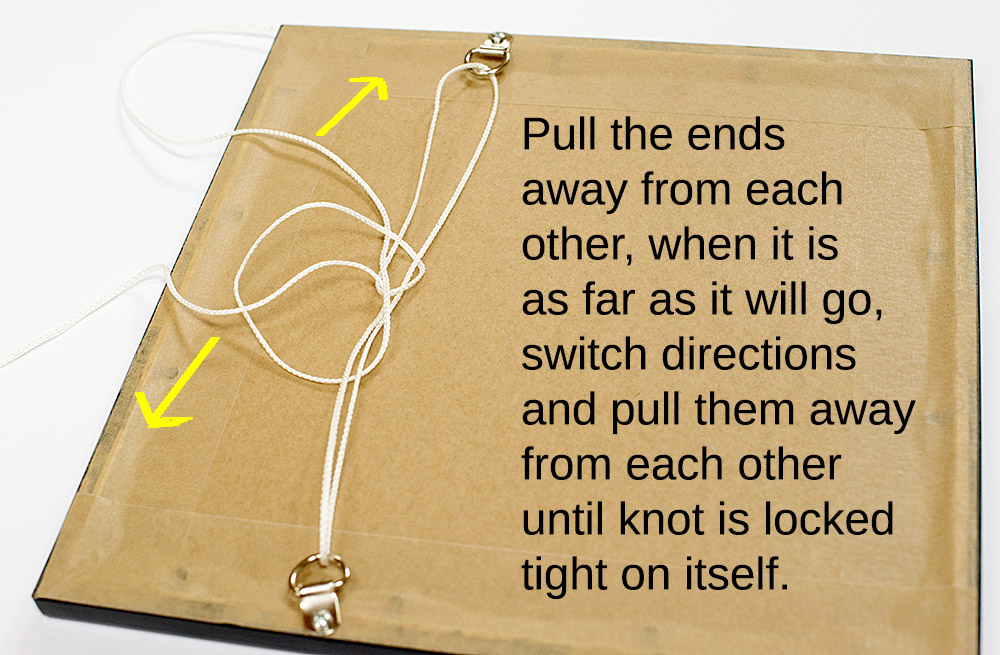
Loop the right hand side back under to the left side as shown below –
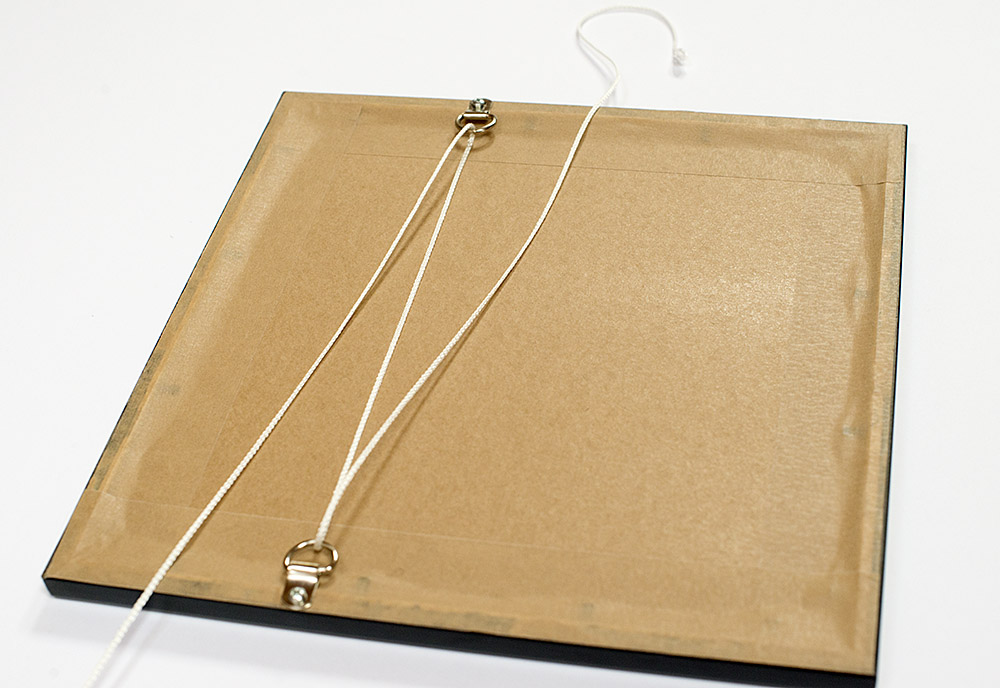
Feed the right hand end through the loop that you just created as shown below. Pull either ends of the cord away from each other until knot tightens, change directions of pulling by 1800 and pull again in opposite direction to tighten –
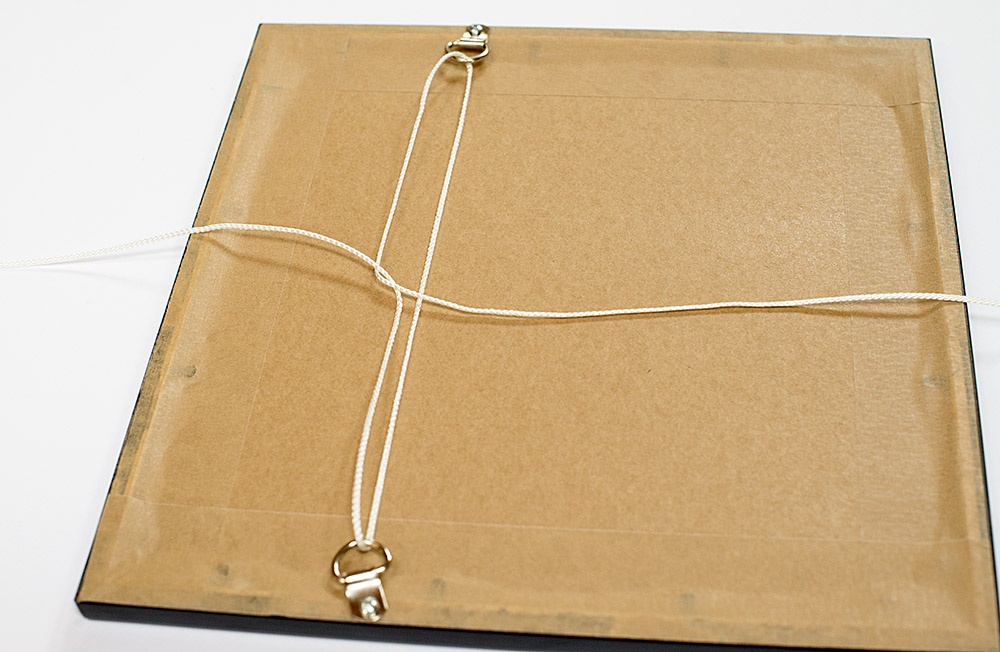
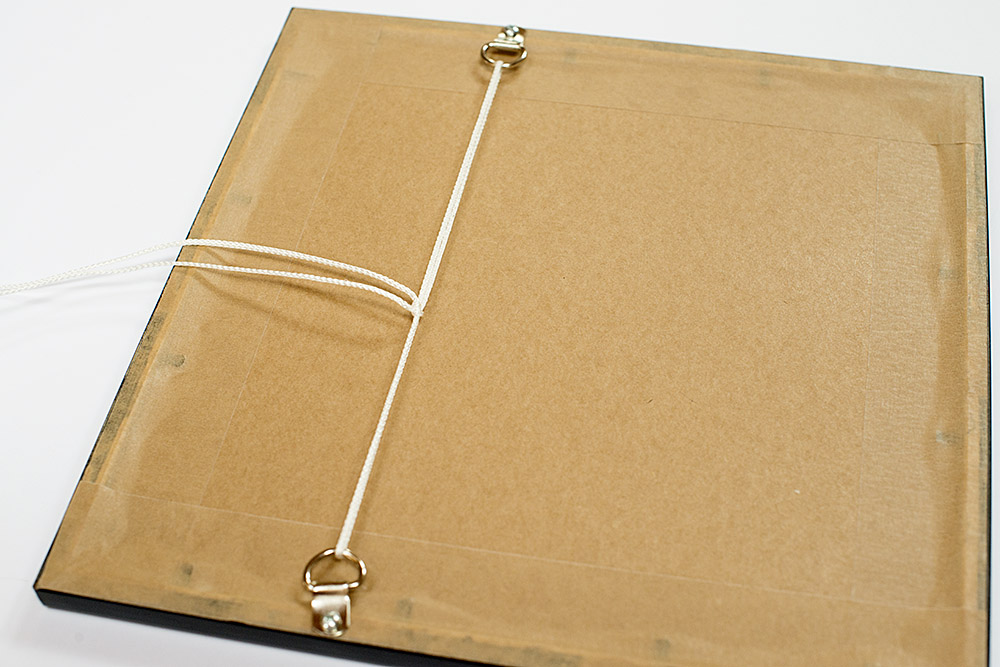
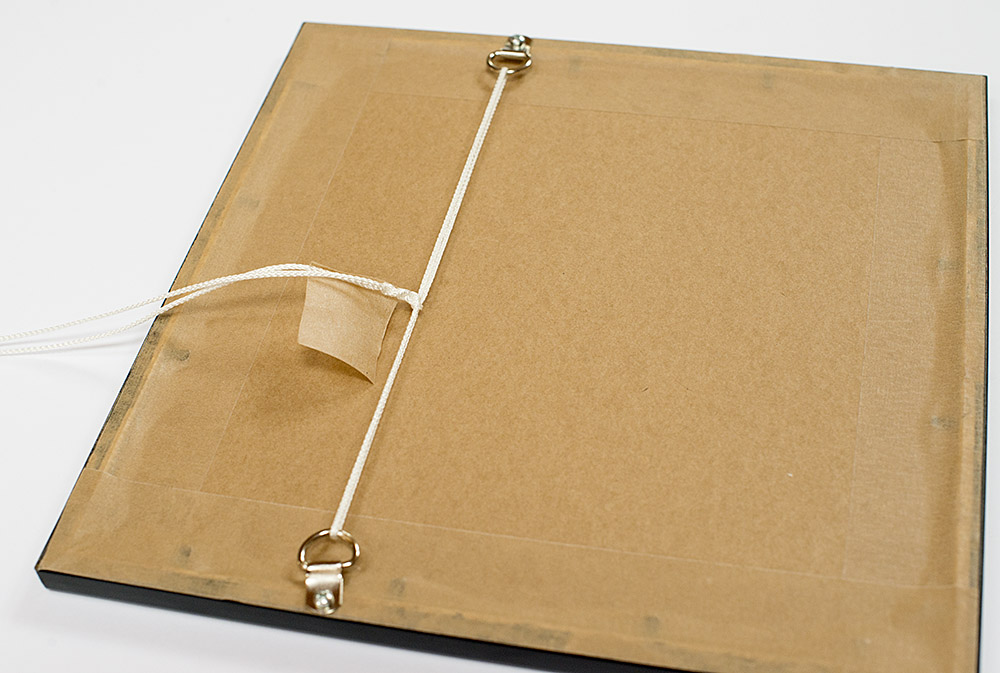
The knot and the cord should be tight, and not able to slip out or slacken –
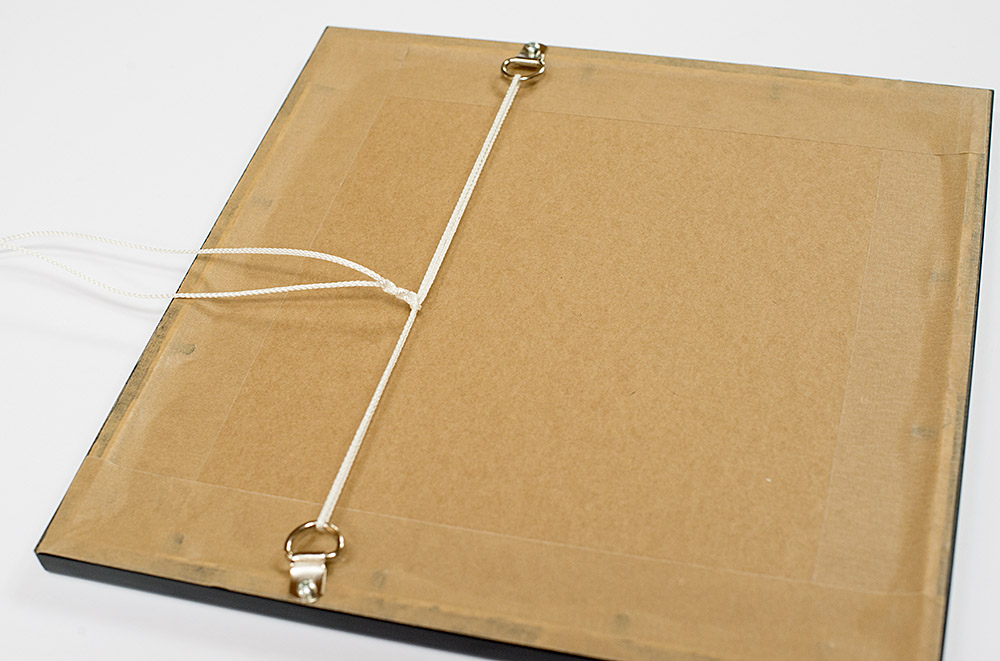
Tie a few ‘granny knot’ L over R, then R over L to secure the underlying knot –
Secure by wrapping small piece of ECO-15 tape around the tied ends –
Use a craft knife to cut through the cord wrapped in ECO-15 tape –
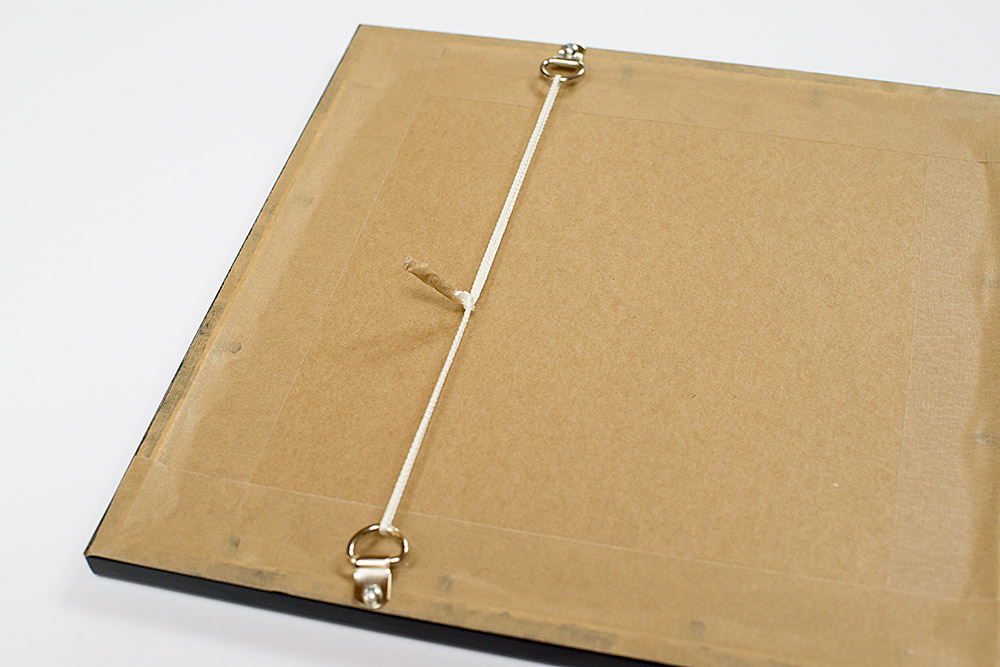
The finished cord/knot combination should have a nice clean looking finish, and should provide a tight and secure cord to hang the picture via a picture hook on the wall –
I recently had the opportunity to confront head on an issue that had become apparent while cleaning some ageing 2mm float glass. It made me explore the possibilities as well as finding a solution!
The problem : the 2mm float glass that is commonly used in picture framing is normally supplied in a bulk quantity to the picture framing shop. Bulk can be upwards of 50-100 sheets at a time, which is difficult heavy work to shift all at once. The glass is supplied usually in 1.2m x 0.92m size sheets. They come with a large piece of very thin white paper sandwiched between each glass sheet which offers some scratch protection during transport.
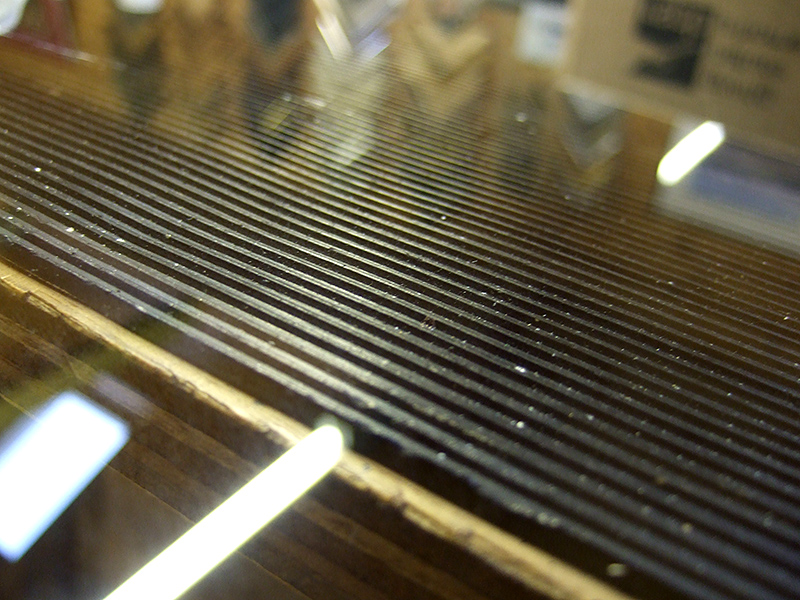
Glass mottling from paper residue (click image to enlarge)
The downside to having these sheets of thin white protection paper is that they are very susceptible to moisture ingress and if not immediately stored in a non damp environment can themselves wick moisture up into the face of the glass sheets leaving a residue on the glass surface. The residue looks like a very faint mottling effect. It is also almost invisible unless viewed at an angle under artificial lighting conditions.
This residue has proven very problematic to remove, resistant to just about every common glass cleaner, and a glass supplier once told me, “Once it’s there, nothing can take it off”. Up until this week, I believed him!
Having received a large delivery of glass quite some time ago, and having chosen to store it in a convenient but slightly damper environment, I proceeded to immediately remove all of the paper from between the sheets when it first arrived. I erroneously though that this would take care of the issue, but now that I’m coming to the end of the supply, I have found that this same glass mottling effect is still prevalent despite the absence of the paper. I can deduce from this that the paper must leave some residue on the glass which remains even after it has been removed. This lingering residue then appears to react to dampness which hardens into the slightly visually mottled effect, resembling a faint “etched” like appearance.
I had previously found no glass cleaner that could clean it. I was convinced it was surface contamination rather than an actual ‘etching’ effect, because I found that you could actually remove some of it with a flat sharp blade. I found that this worked even better when the blade was combined with some glass cleaner as a lubricant. However using the blades could have the downside of leaving hairline scratches on the glass which is a non-starter with picture framing. I had to find another solution to clean these sheets or risk having to throw them out completely.
To start with, I identified that the mottling effect was only happening on one face of the glass. This I surmised was likely due to the paper surfaces having one face different from the other, and one side being prone to leaving the residue. I then tried a few different methods of removal listed in the table below along with the outcomes –
Methods tested
Results
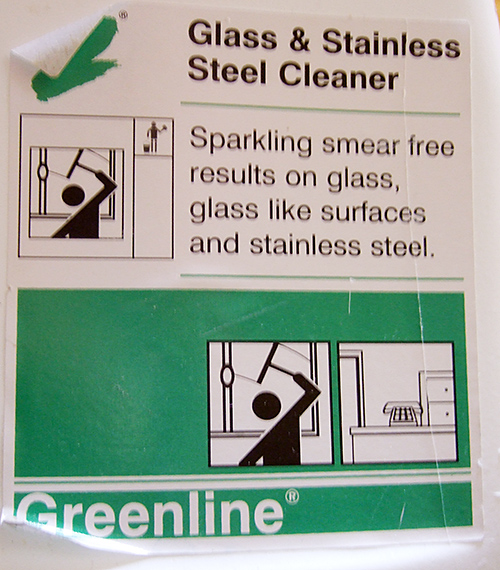
Greenline Glass and Stainless Steel cleaner
No visible removal of mottling
Greenline Glass and Stainless Steel cleaner + mount cutter blade surface scape
Partial or whole removal of mottling but with risk of fine glass scratches and slight streaking.
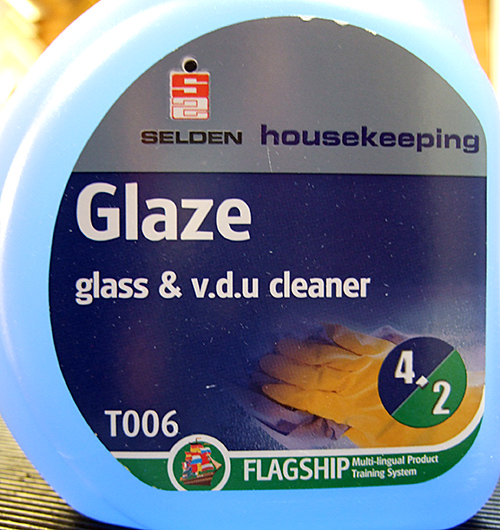
Selden Glass & VDU cleaner
No visible removal of mottling
Mr Muscle Window and Glass cleaner
No visible removal of mottling
Zest-it solvent
No visible removal of mottling
Tesco White Wine vinegar
Used raw, undiluted led to immediate removal of surface mottling, although sometimes required a light second finishing wipe. Then cleaned with a final standard ph-neutral glass cleaner clean afterwards.
As you can see, the only really reliable approach was found using one of the oldest known glass cleaning substances – undiluted vinegar and kitchen roll. The effect was immediate and repeatable with clean kitchen roll used to wipe it off.
Cleaned glass ready for picture frame (click to enlarge image)
Now this raises another issue in that vinegar is essentially acetic acid with water, and has a ph of 4-5 (acidic). It also has the usual pungent vinegar smell, which is hardly going to appeal to anyone picking up a picture frame!
To avoid leaving acidic residues which could in turn affect the longevity of the mount and artwork, I gave the glass a thorough dry before applying two coats (and clean off) with my regular glass cleaner which has a more ph-neutral rating and a much less pungent smell.
Top tip: If you have to use this technique to clean your glass, just remember to clear away all the vinegar soaked kitchen towels as well as the vinegar bottle before the customers arrive to pick their frames up, other wise they might just think they turned up at the local chip shop!
An autographed sports shirt requires to be mounted and framed in a narrow black shallow rebate moulding. (Many frames for sports shirts are constructed with deep rebate mouldings, limiting choice).
Method :
Prepare the shirt, iron it and then make it rigid for mounting.
Mount ‘rigid’ shirt by sewing the shirt on to black foam board
Cut a mount to surround the shirt and space it from the backing board with pieces of black core foam board.
Build wooden box walls.
Attach a backing board to the wooden box walls.
Create a frame from moulding.
Glaze.
Fit mount to wooden box.
Join together and finish.
This process sounds straightforward, but the first 2 steps can take over 2 hours to do. Stretching and stitching the shirt to the backing foam board is a slow and manually intensive task.
Lets take a look at each stage –
1. Prepare the shirt, iron it and then make it rigid for mounting
I started off by ironing the shirt, as it would otherwise just be crumpled and creased. I do this by putting a tea towel between the shirt and the iron so that I don’t damage the shirt or signatures in any way. In this example it is a cotton shirt and I do want to get the creases out, so I used the iron on a steam setting. Note: this may not be the best setting for other shirt materials (please consult the garment labels before ironing!). Remember to iron the sleeves and collar to be as close to the way you want them to appear when framed.
Shirt stretched and waiting to be stitchedStitching the shirt to the backing board
To make the shirt rigid, I cut out a piece of mount board in roughly the shape of the shirt but wider, so that the shirt will stretch out and look unwrinkled. The mount board is used white side forward so as not to let a colour show through, making the shirt appear less than white! I made a rounded cut-out at the collar location so that the mount board would not be visible. You can see the mount board in the image shown as I have the collar undone to allow access for stitching. In this project I also made small mount board cut-outs to stretch the sleeves as they had to display the logos on the sides of them correctly. All mount board cut-outs are carefully positioned inside the shirt to give it a flat, stretched out look.
The sewing is done at various points around all the edges of the stretched shirt and sleeves to hold it firmly in place on the backing foam board. I tend to use a standard cotton thread that is as close to the colour of the shirt as possible with a medium sized standard sewing needle.
Making hidden stitches behind the collar
You can sometimes sew directly from the visible side of the shirt to the foam board at the back if the thread is very close in colour and you make stitches at the location of existing shirt seams where they will not be as noticeable.
Where possible, just hide the stitches – eg behind the collar is a great place. The shirt will need to be stitched several times and in different places along the neck and shoulders as this will be the best anchor point for ‘hanging’.
Stitches through the backing foam board
I usually do about 20-30 separate stitching points in total to secure the shirt to the backing board. After I finish each stitch I cut the thread, then tape down the loose ends of the thread to the back of the foam board with ph7-70 self adhesive conservation tape.
Stitched shirt standing vertically
After the shirt has been stitched to the backing foam board, you should be able to stand it upright and see how it looks when it is vertical. If you see any loose or crumpled areas or some other gravity effect you don’t like the look of, then you will need to add in another stitch or two to make it look better. It should be noted that this is how the shirt will look in the frame while hanging on a wall.
3. Cut a mount to surround shirt and space it from backing board with pieces of black core foam board
Cutting a mount for a shirt is no different from cutting a mount for a picture, except that shirts are large and hence the surrounding mount will be large too! You also have to be able to keep the glass away from the shirt and hence need the box frame to do this. The mount itself should be wide enough to hide the internal sides of the box. After I cut the mount, I use strips of black core foam board (so it’s dark and invisible should anyone peek in behind the mount) to space the mount from the backing foam board. The foam board strips are held in place by ph7-70 ATG double sided tape.
Stitched shirt with mount attached to backing board
Once finished, the mount and foam board strips and foam backing board should look something like this. It is starting to look like the finished item.
4. Build wooden box walls
Box frame walls mitred and waiting to be joined
For the walls of the ‘box’ I just use thin strips of inexpensive 44 x 12mm (1 3/4″ x 1/4″) pine wood bought from a local timber store. I use the mitre guillotine to mitre them and join them with v-nails as I would for a standard frame.
Box frame walls with v-nail joins on both sides
The v-nails are put into both the top and bottom edges of the box corners, as well as wood gluing them together. The size of wood you use here will determine the depth of the box, so if you want a deeper box then go for >44mm if you want less depth go for <44mm. The whole point of the box is for it to be deep enough to keep the shirt (or another 3D object) from contacting the glass. Just measure your object’s deepest dimension to come up with an acceptable depth.
5. Attach a backing board to wooden box walls
Taped and screwed MDF on back of wooden box
I then cut out a piece of 2mm MDF to the exact outside edge size of the wooden box walls. This backing MDF can be screwed or nailed down to the box walls. The end result will be an open sided box, almost like a crate with a front missing. I finish the long edges off by taping them together with ECO25 frame backing tape before securing the MDF backing with pan headed wood screws.
6. Create a frame from moulding
Front frame sitting on top of wooden box
The next step is to cut the actual frame moulding. Because we have created a box (in effect a deep rebate), we can use any shallow rebate moulding to surround this box. This gives us a lot of flexibility when it comes to moulding choice – we can use any moulding, as opposed to just using the one or two deep rebate mouldings that we may happen to have in stock. We cut the front frame to fit the box outside edges. Once finished, it should sit perfectly on the wooden box as shown. We can remove the frame for now and place it to one side. One point of note is that there will be no weight bearing done by the front frame as the cord and d-rings will be screwed into the box, so theoretically, you can use quite fine moulding here.
7. Glaze
Mount and shirt with glazing
I usually use a small vacuum cleaner to clear out any loose specks of dust, dirt and hairs or threads inside the foam or mount enclosure and the shirt surface before fitting the glazing. Remember that this is the last chance to spruce the shirt up before displaying it. We can now cut the glazing to fit exactly on top of the mount after cleaning both sides of the glass. This will keep all external dust, dirt etc out of the shirt and mount area.
8. Fit mount to wooden box
Shirt mount with glazing fitted into box enclosure
The mount with shirt and foam backing can then be fitted into the wooden box that we created earlier. The mount edges (and glass edges) should completely cover the wooden box to its outside edges. If the depth of your mount is slightly smaller than the depth of the box, you can pad out the difference with foam board offcuts.
9. Join together and finish
Right angled picture plate holding frame together
The next step involves placing the constructed outer frame (moulding) over the glazed and boxed shirt. We then proceed to join the moulding to the wooden box. For this I am using brass plated right angled picture plates which are screwed into both the wooden box sides and the back of the moulding.
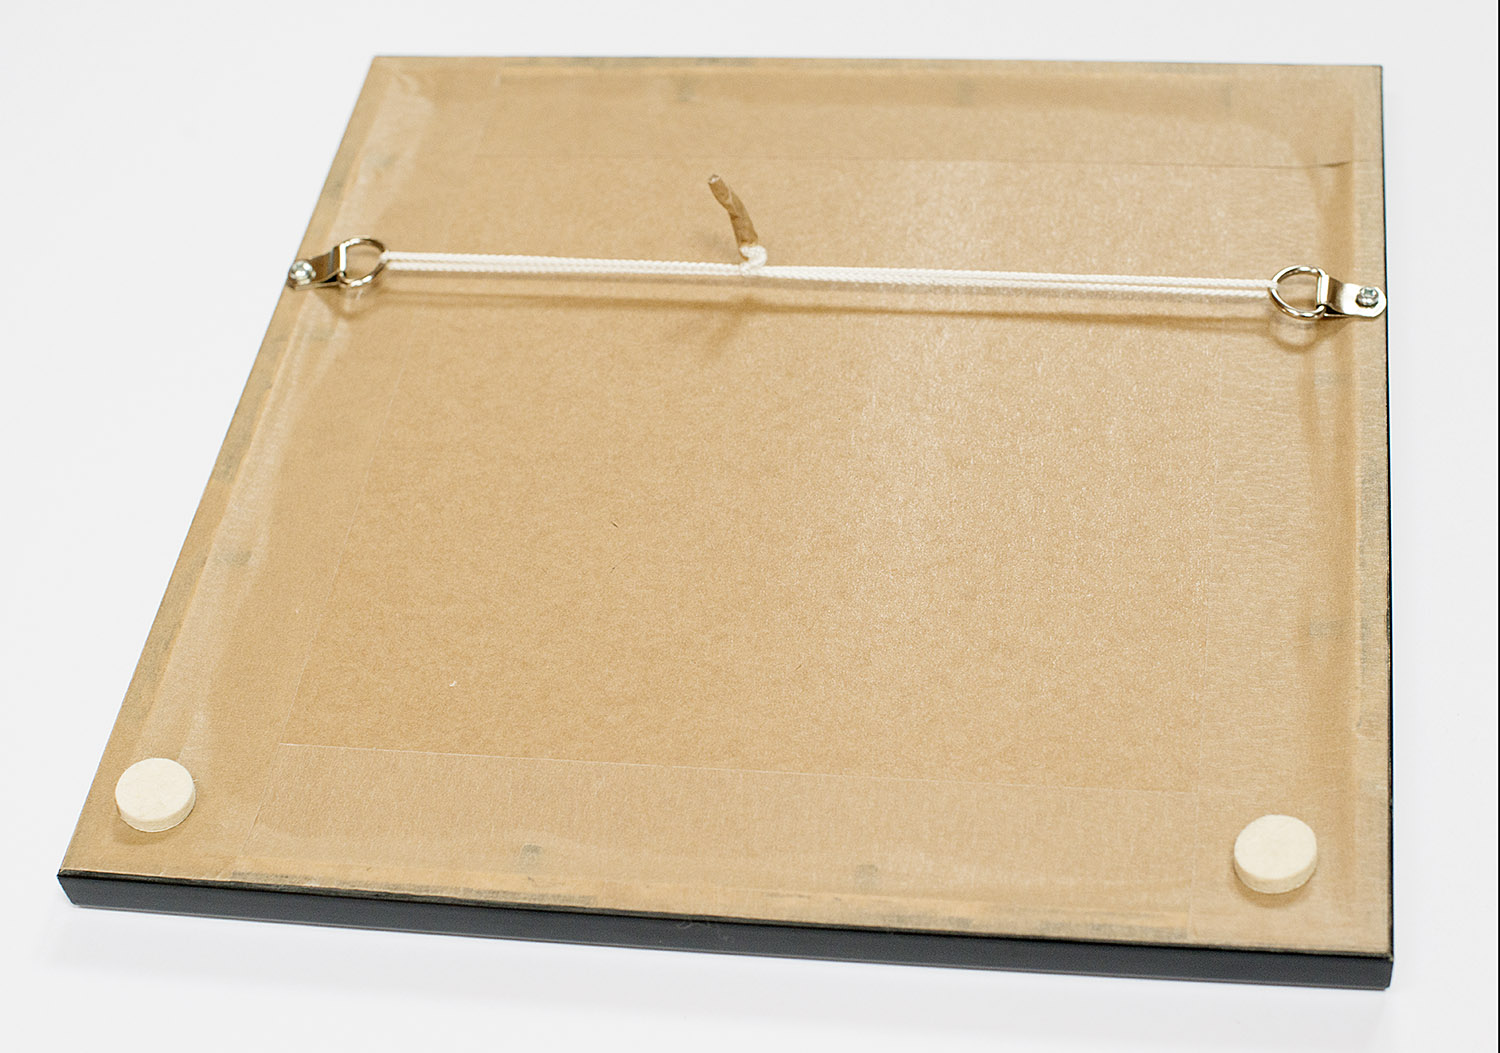
Frame finishing with D-Rings, low stretch picture cord and felt pads
To finish the frame I delicately flip it over, face down on bubble wrap to protect the moulding face from damage and place felt pads at each bottom corner (for wall protection) as well as brass plated two hole d-rings at the side and at the bottom of the box frame (not the front frame) to distribute load. I tie it up with #3 low stretch picture cord.
The frame is now finished and looks just like the first image at the top of this article.
Discussion
3D box frames can be accomplished more simply with a deep rebate moulding, quite often without a mount, but this generally limits the choice of mouldings that you can offer. It also limits the depth of the frame box to whatever the rebate depth is, which may be fine for some thinner 3D objects and collarless sports shirts. With the method described in this article, I can build deeper boxes if needed so that I can frame something with bigger depth dimensions without the need for specialised deep rebate mouldings.
The only downside to 3D frames is the time it takes to make them, which can take anywhere from upwards of 5 hours.
Stretched canvas prints can be easily fitted into a picture frame. Several methods are available, but one of the easiest is probably the use of offset clamps. These are little metal steps that come in varying step sizes of 3.2mm, 6mm, 9mm, 12mm, 18mm, 25mm, 31mm. The clamps are all approximately 10mm wide.
The different depths of step are available in order to accommodate most common depths of stretcher bars on canvas prints. The frame may also include a slip which will decrease the depth of the frame rebate and require the use of a smaller clamp size.
The stretched canvas is placed into the frame and each clamp is screwed down (by use of #4 zinc plated screws) in close proximity of the stretcher bars of the stretched canvas in order to hold it in place.
If the step ends up being in between a step sizing, you can use small pieces of felt in order to pad out the spacing.
Typically to finish a framed canvas print I will be finish it off as shown below by placing the stretched canvas in the frame, then placing a backing board (2mm MDF) on to it, taping in place with ECO15 or ECO 25 frame backing tape then clamped down in 2-5 places on each side (depending on canvas size) with the offset clamps. Once offset clamped on all four sides, the canvas will be securely fitted in the picture frame, and will be ready to attach a hanging solution in this case D-Rings and cord.
In order to keep the metal backs of the offset clamps from scratching a wall surface / paintwork, two small round felt pads can be placed on the bottom corners of the frame as shown which will keep the clamps from being in contact with the wall.
Alternative solutions include spring retaining clips, z-clips or bendable brass plates.
Picture Hanging Cord or Picture Hanging Wire? That is the question. A lot of people assume that picture hanging wire is stronger than picture hanging cord. This can be a false assumption. Many polyester low stretch quality picture cords can be a much more robust solution than some picture wires.
Picture Hanging Cords
Picture cords (especially quality low stretch polyester) have strength characteristics that will not be affected by environmental issues such as moisture degradation or rot (unlike string which you should never use for picture hanging). They (along with wires) are rated by their breaking strain. The following table lists the recommended loading –
Even with the maximum recommended loads for the cords, it is always safer to give yourself a larger margin for error and switch up to the cord size above what you think you will need.
The cord of course will only be as secure as the quality of the knot that is tied coupled with the robustness of the picture hook and hanger that the cord is attached to.
Polyester low stretch picture cord will approximately stretch only about 12% as opposed to 26% or more for for cheaper alternatives. This should ensure that you never see your picture hook being exposed due to cord stretching with load.
Picture Hanging wire
Stainless Steel Picture Hanging Wire is the alternative to picture cord. It will not corrode, is of excellent quality and will shape and wrap easily. Similarly to cord it will still require a good knot tying technique.
Brass picture hanging wire has brass strands wrapped around a strand of steel.
Wires are specified by a Maximum Picture Weight and this should be treated with a margin for error. Ideally you should pick a picture wire that is double the weight specification of your picture.
Whether you choose picture hanging cord or picture hanging wire to hang your picture, you will need to choose based on load criteria, ability to securely tie to fixings and personal choice as to what you think works best for you.
Standard D-rings come in 1 hole and 2 hole variety. 2 hole D-rings are slightly larger and made from slightly heavier duty metal than 1 hole D-Rings and are used to hang heavier frames.
D-rings are usually placed about 1/3rd of the way down the picture frame on each side. They are attached by pan headed screws which can be different lengths depending on the depth of your moulding. If you put a 13mm screw through a 12 mm moulding then you will end up punching through the picture frame face which would obviously not be a desired outcome, so choose your screw lengths wisely!
The D-Rings can come in standard size, or small sized to suit smaller moulding widths and smaller frames.
Another form of D-ring is the solid ‘D’ D-ring which is made from one solid loop (stamped metal) ‘D’. The sold loop may give extra security in some applications. Standard D-rings are formed with the ‘D’ made from a non-continuous looped D of metal.
You can also get Fancy loop D-Rings (is that still classed as a ‘d’?) which are used purely for artistic effect, but require small pins rather than screws for attachment to the frame edges. This type of D-ring is recommended for lighter frames only.
Angled D-ring picture hangers are another option. They come in pairs (left +right) and give you the security of a two-screw fixing on all types of moulding, including narrow frames. The angled D-ring hanger is angled to give the correct alignment of the cord or wire and to minimise stress in the frame.
In summary, D-rings are by far the most commonly used way to hang picture frames. They can be bought in bulk with multi-packs too.
Ever wondered what size a number ‘4’ screw is and whether you’d be better with a number ‘3’ ? well here’s a table of screw widths (thread widths) commonly used in picture framing –
 This how to guide shows how you seal and finish the back of a picture or photo frame prior to hanging or selling.
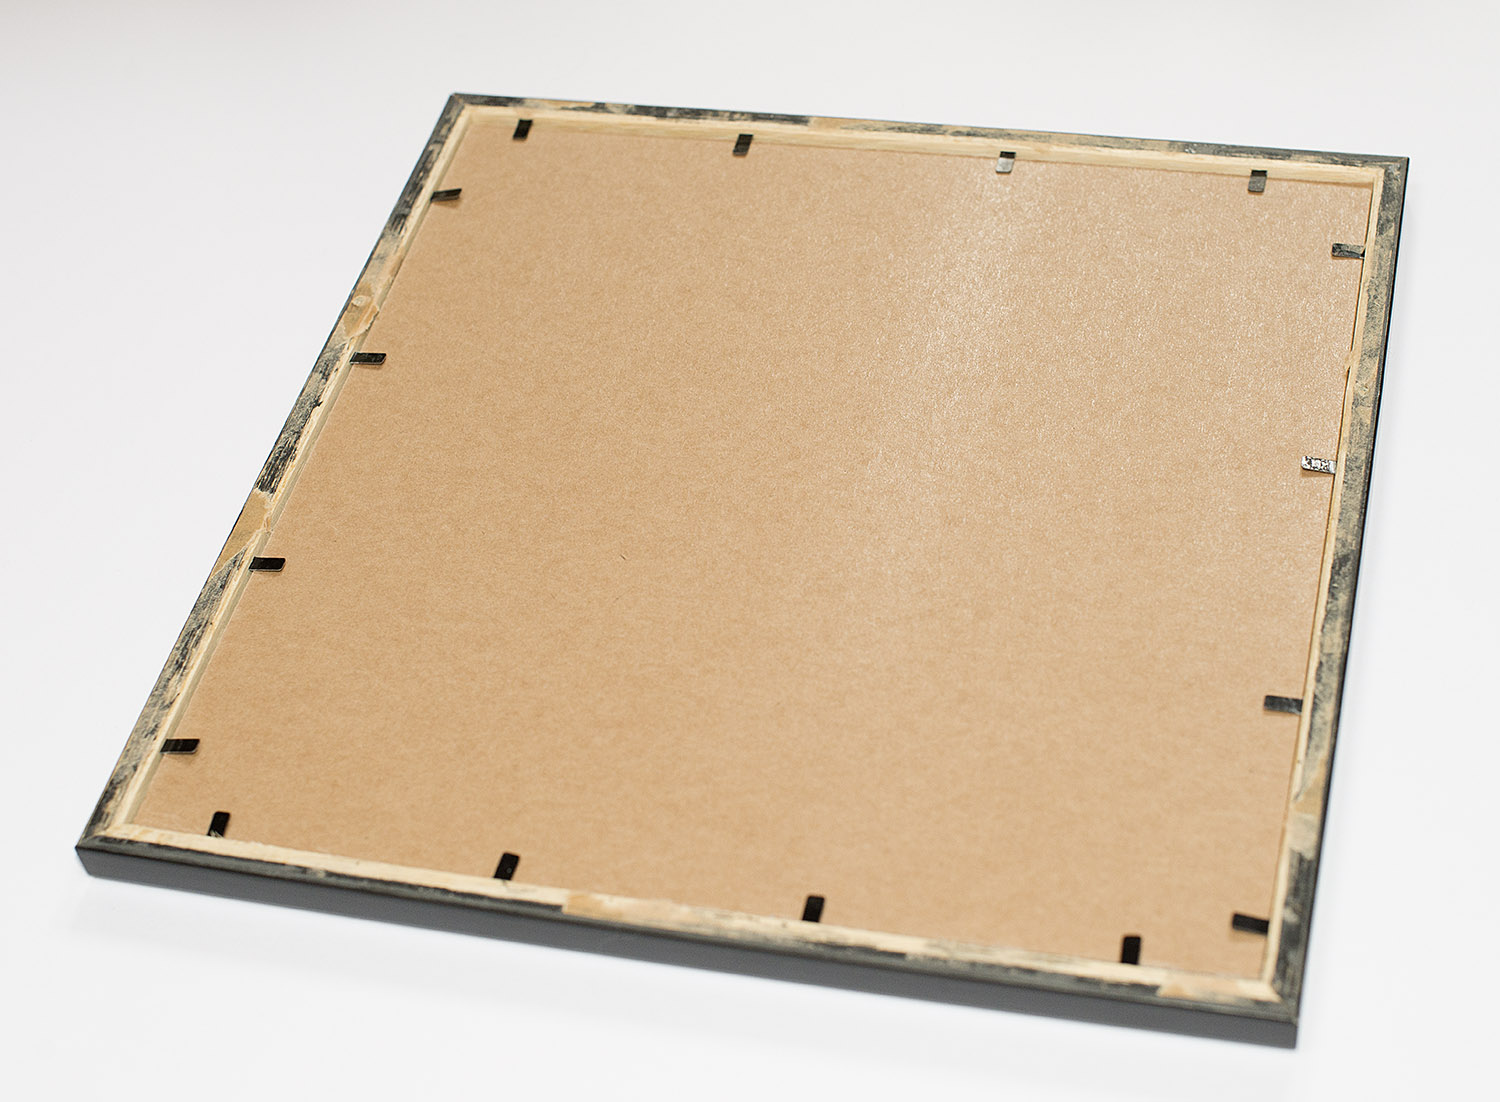
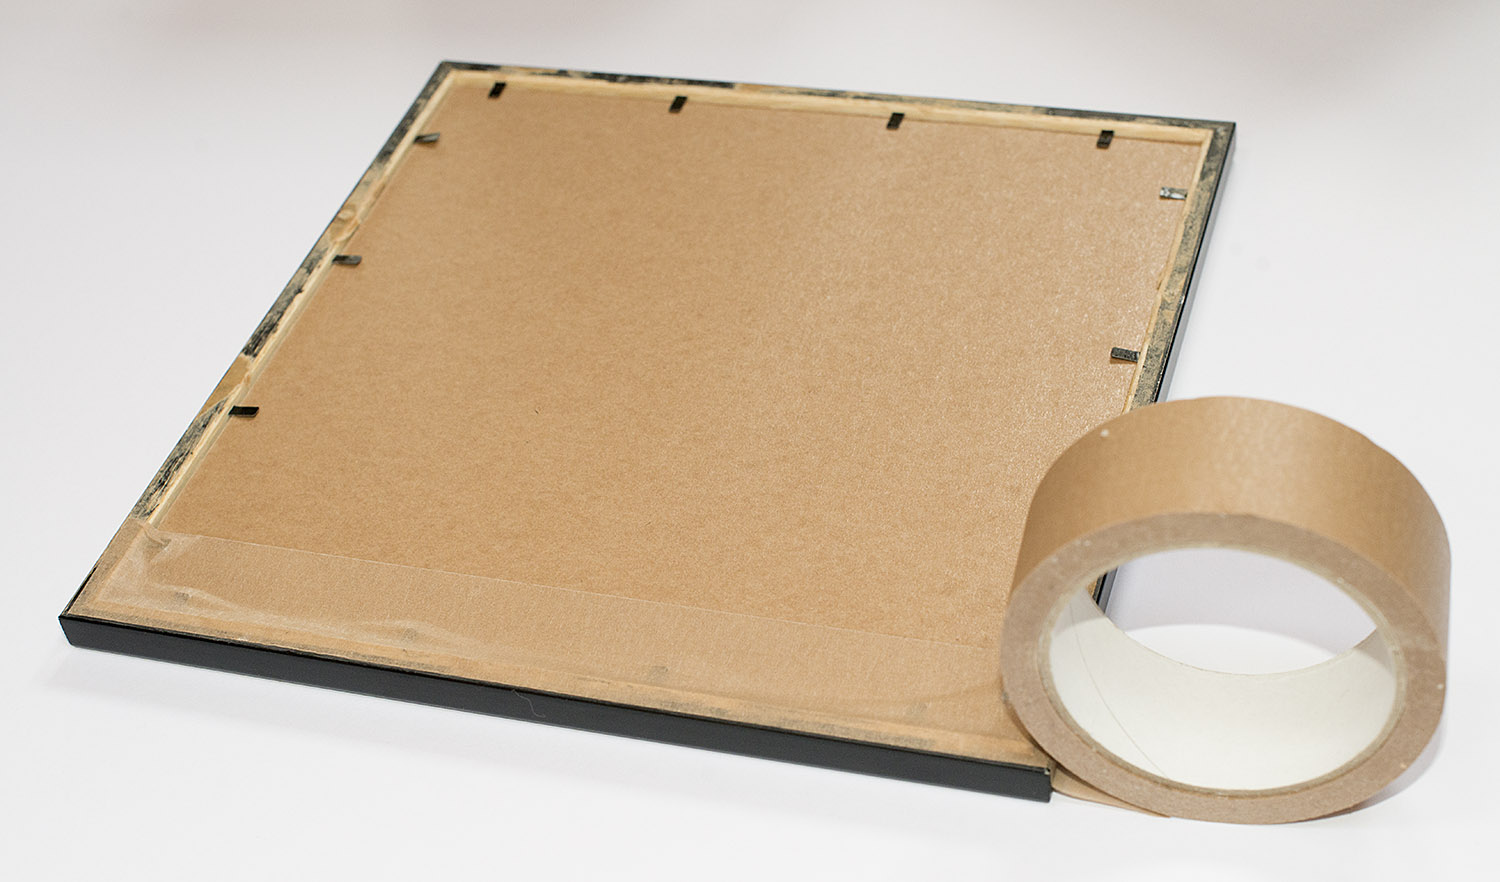 After taping and trimming the tape edge on all four edges it should look like this –