What exactly is an over-cut or undercut picture mount? What is it that creates these effects? How do you stop them from occurring? What level of under/over cut is acceptable?
An over-cut picture mount
An over-cut picture mount
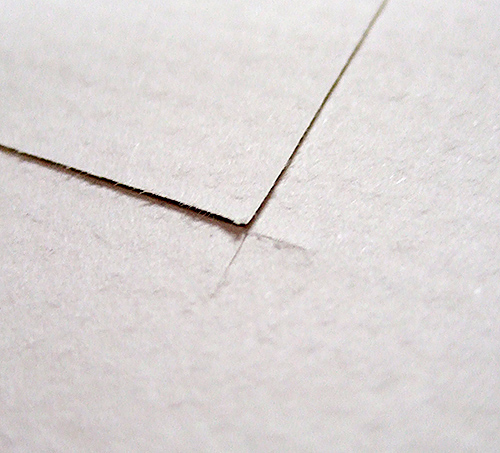
An over-cut refers to a picture mount that has blade cut over-runs this can be in either one or two directions at any corner. this effect is shown in the picture on the right. In this example the over cut to the right side of the image has happened due of the start point on the mount cutter blade being set too early, the one to the bottom of the picture is due to the end stop on the mount cutter being set too late.
In the case of an over cut mount, whether it is perceived acceptable or not will depend on how bad the over-cuts look to the naked eye. They can be burnished down with a burnishing bone which can smooth them down to unnoticeable levels. However, badly over-cut mount corners (>1.5mm or so) will not be acceptable and will render the mount scrap.
An undercut picture mount
An undercut picture mount
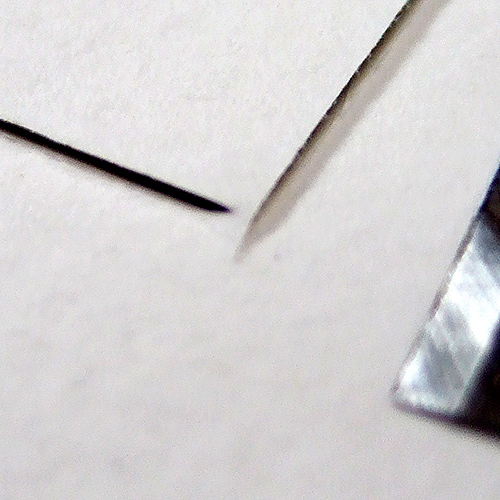
An undercut picture mount refers to a mount that has blade undercuts and as a result will leave a incompletely cut mount centre that won’t drop out. This undercutting can occur in both directions depending on the blade entry and exit point settings. In the image shown, this particular undercut is caused by the blade entry point having been set too late.
Undercuts (provided they are not too large) can usually be remedied by carefully taking a spare mount cutter blade by hand and holding it at approximately 45o and completing the cuts manually. What you should not be tempted to do is just pull the undercut paper ‘tag’ away, as this can lead to facing paper tears which will likely make the picture mount corner visually unappealing and you may have to start with a new fresh mount board and cut the mount again.
So what defines a perfectly cut picture mount? The ultimate goal is to cut a picture mount in which the centre falls away with no visible over or under cuts. ie the entry points of the blade will exactly coincide with the exit point as seen from the front of the mount.
How achievable is this?
On a mount cutter there are usually several criteria that can affect whether you produce the perfectly mount or not. They include –
Blade depth
Security of blade (how well is it held in place ie. if its not tightly secured, it may get pulled out further when you start to cut. This is especially true with thicker mount boards!)
Thickness variations of the mount board (changes from board to board, or supplier to supplier)
Accurate offset calculations for start and stop points for a particular mount board.
Squareness of the mount board edges and corners
Uneven hand pressure when pulling the mount cutter head to do the cut.
Changes in any one of the above criteria can lead to over-cut or undercut picture mounts.
A mount cutter can be fine tuned, but will likely need to be adjusted for every different type of mount board cut even though they are all for example labelled as say 1.4mm. I have seen +/-15% thickness differences between mount boards of a certain specified thickness. The thickness also varies with the texture of their facing papers too, heavily patterned boards can add an extra 0.2-0.4mm thickness, where as flat finishes can be more spot on at 1.4mm. Ideally you really need to create a test mount to fine tune the mount cutter based on the board that you want to make the final mount from, this can be done on a smaller piece of mount board to avoid wastage. How many times you choose to do a fine tune of the mount cutter will boil down to how much mount board you want to waste (in test mounts) and how much of a perfectionist you are.
What is an acceptable level of over-cuts and undercuts? The following table summarises what I generally go by –
Size of over/under cut
0-0.5mm
0.5-1.5mm
=>2mm
Undercuts
perfect mount
acceptable but will likely need manual intervention with a blade to finish it
May be retrievable with a blade, but keeping the blade in a straight line at 45o by hand may be difficult
Over-cuts
perfect mount
acceptable mount, burnish any ragged over-cut edges away
A multi-aperture picture mount is a mount that has multiple openings to accommodate more than one picture in the same mount (and ultimately in the same picture frame). It can be used to group similarly themed photographs or pieces of artwork together. Openings can also be made (if desired) to place titles into the mount which can describe the content.
A multi-aperture mount can be created using even the most basic of mount cutter systems.
The majority of work involved in making a multi-aperture mount should be focused on the planning stage. A well planned approach, including an accurately calculated mount size, choice of board colour, and a detailed sketched outline is required to eliminate potential errors (and wasted board) before any cutting is ever done.
Good planning of the multi-aperture mount is critical to success.
In the following example of a multi-aperture mount I have 3 similarly sized small photographs of a dog. More complex variations of photos, eg all differently sized, would require an even more careful planning and measuring.
In this particular case, there is a straightforward choice of either horizontal or vertical placement of the photos with no title. The customer had chosen vertical placement so I planned around this. Sometimes, although not always, the order of the photos or artworks will be important so it is always best to check with the customer. You can lay the photos on to a piece of mount board to help you with your choice of layout as well as choice of mount board colour. In this case I am just using a whitish cream colour, but quite often more colourful boards work well too. You will just need to experiment!
The sketch of your plan is important to list all the spacings and sizes as well as providing a visualisation of your project.
After you have created your layout and chosen the colour of mount board, the next step is to plan it with a sketch. I usually just do a rough and ready drawing on a scrap piece of paper or mount board. In this case, I have measured the photos (cropped) to be 95 x 95 mm each and I want to lay them out with a 30 mm internal gap between each one. The spacing to the outside of the mount should be double this value to look correct. I have also added in 5 mm extra per side making it 65 mm spacing to allow for the 5 mm of rebate of the frame. This will mean that the visible mount (after being framed) will be 60 mm around each outside edge.
I then add up the totals in each dimension (65+95+30+95+30+95+65) = 475 mm in height and (65+95+65) = 225 mm in width. This will be my outside edge mount size. I will then cut both my mount and backing boards down to this size.
Measuring spacings for one of the apertures. Measurements should be referenced to the outside board edge not cumulatively to each other.
Once I have the front mount board I can start to measure and draw the pencil plan on the back side of the board (always use pencils, you can erase the lines to make changes, and they don’t leak ink!).
Note: when you sketch on the back of the board, be aware that it will be the mirror image of what will appear on the front. In my example, it won’t be any different, but if you have different sized images it is something that needs to be taken into account).
The fully planned and measured mount back with apertures shaded and ready to cut them out.
Measurement and drawing of a 65 mm edge is done by starting from the outside of each edge of the mount board. Measurements should be referenced to the outside board edge not to each drawn line as errors can have a cumulative effect. We measure inwards to include the pencil outline for each mount aperture. Once you have completed this exercise you should have something that shows where all the aperture cut-outs will be. I usually shade these areas in to highlight them as there can be so many lines sketched out that you can easily get confused when doing the actual bevelled cuts into the mount board with the mount cutter.
It’s time to start cutting the mounts – you can use any mount cutter to do this, but some of the more sophisticated systems can actually be harder to use with multi aperture mounts as you will have to rotate the mount 360 degrees when cutting out each aperture. This can be an issue with bigger or longer multi-aperture mounts which can be obstructed by some of the larger mount cutters’ arms and stops. For this reason, I generally use a hand held mount cutter system which gives me the room and flexibility that I need to move the mount around unrestrictedly whilst cutting it. In this case I am using a short Logan Adapt-a-rule with a pull cutter head. Remember while mount cutting that, as with every other mount cut, you have to use a slip mat behind the mount to cut into at all times. This is easy to forget as you move the multi aperture mount around, but failing to do so will result in bad cuts and bevels.
Starting to cut out the mount apertures one by one.
I then start to cut each aperture out. It is important to always focus on one aperture at a time. After cutting one opening out, I make a point of using masking tape to stick each cut out aperture back in temporarily to the mount to preserve each mount bevel as I continue to work on the other apertures. This approach also provides a flat surface for the mount cutter to operate on.
The finished mount minus the photos.
When cutting a multi-aperture mount, it is easy to get distracted and cut the wrong line or edge. To avoid this I use the following rule – make sure each of my shaded aperture patches is always visible to the right of the mount cutter head before doing a cut. If you don’t follow this approach, you could end up cutting a few reverse bevels, which would mean a complete restart.
After cutting the 3 apertures out, the mount now looks like the picture on the left (with backing board behind it in this case). The backing board should be attached to the front mount along its longest edge (for stability purposes) with ph7-70 acid free conservation mounting tape. Creating a hinged mount.
Fitting the photos to mount with T hinges
Its now time to add in the photographs. Each photograph can be stuck down with two T-hinges per photo. Alignment/positioning of the photo with the mount can be checked before permanently holding them in place with the T- hinges.
Once this is completed, the multi-aperture mount is now finished and is ready to be framed.
Examples of multi-aperture mounts –
A wedding themed multi aperture mount
1. A wedding multi-aperture mount with title added and framed. A simple layout, but balanced geometrically with a centrally placed title opening. It is also important to make the title look good using a nice font and printed on high quality, textured paper rather than cheap bright white printer paper.
A wartime memorabilia themed multi-aperture mount
2. A complex 3D multi-aperture mount to display wartime memorabilia. In this case I had the challenge of creating 3 apertures, one to accommodate a pencil sketch, but two more for the 3D objects (wartime medals and a military service book).
A picture mount is meant to protect and preserve as well as to decorate and enhance the appearance of an artwork, photo or drawing. Unfortunately, a lot of mounting not only fails to meet this basic criteria, but can also increase damage to the artwork.
Ageing of artwork can happen as a result of exposure to UV light, but more often it comes from acidic tapes, papers, mount board and backing board which leads to the characteristic ‘browning’ of artwork paper after a period of time.
“Any exposure to light harms media and paper, but poor quality mounting and framing damages more works of art on paper than any other agent. Prints, drawings and watercolours can be ruined through contact with unsuitable framing materials, just as they can by amateur restoration and the use of inappropriate techniques in handling, storage and display.”
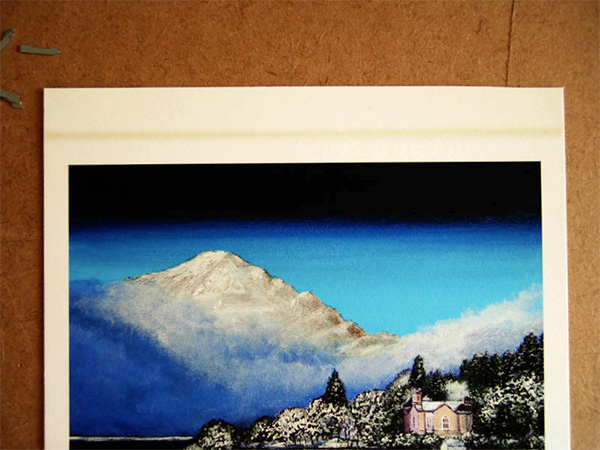
Brown frame backing tape had been used extensively on this picture mount. Both the print and mount would age rapidly with this much acid about.Brown acidic frame backing tape used quite extensively on picture this picture mount. Little regard had been paid to preservation! This piece had been mounted by a professional framing company and it was done to a giclée print that had cost the artist more than £100 to reproduce!
In my time as a picture framer I am quite frequently presented with old artworks that require attention due to ageing (browning and warping caused by unsuitable tapes). One piece that was recently brought in was actually glued to the backing board which itself had warped and had started to discolour the print’s paper. Most pieces brought in for ‘restoration’ nearly always require a new mount with suitable tape attachment.
All too often I have come across cheap tapes used by whoever had done the previous mount or frame. This ranges from the cheapest of cheap cellotape or masking tape, to the sturdier, but still inappropriate for mount use, frame backing tapes. Many tapes can also become brittle, lose their adhesive and simply fall off. Believe it or not there are still lots of picture framers doing this poor, shoddy work. I suppose the idea is that they can save a bit of money and no-one will notice when the frame is closed, finished and paid for! However, picture framers should really take on the responsibility of preserving the customer’s work using best conservation practices.
Brown acid ageing of the thick paper on this giclée print had happened due to brown frame backing tape being used for mounting purposes. This happened in a relatively short period of time 1-2 years approximately!
Conservation mounting is the process of using materials and techniques which provide protection to framed works of art on paper and preserving them from this ageing process.
So how do you protect against ageing in a picture mount?
Materials
The first step is to choose acid neutral papers, mount boards, other boards and tapes to do the job.
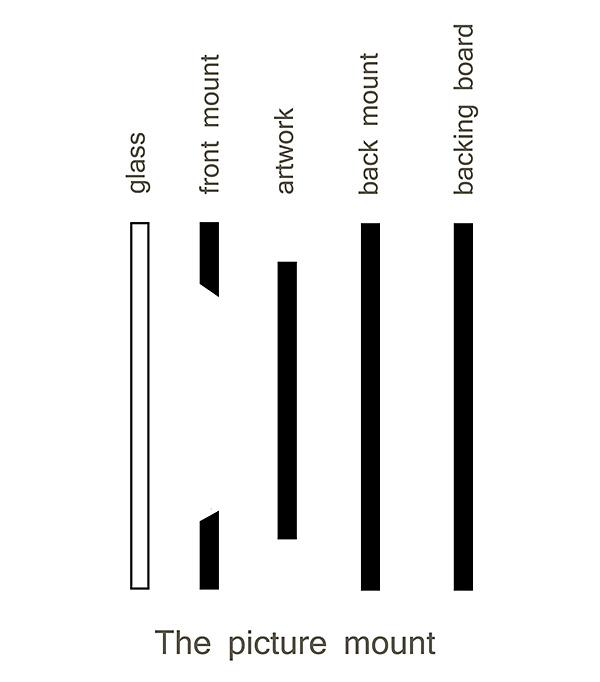
Conservation mount board is quite commonly available these days, and will help reduce ageing. Creating an acid free sandwich of a mount/backing board, ie conservation mount on front with a backing board of conservation mount board before the actual backing board, will also help prevent ageing.
The layers involved in a standard conservation picture mount / frame.
I have also successfully used acid free foam board as a good, solid, robust mount backing board for larger prints or mounted prints for display purposes.
Alternatively, for a cheaper but still ph-neutral solution, there are some boards now available that combine waterproof surface, brown backing and a layer of white conservation paper on the face.
These boards are 2mm thick and offer affordable conservation. These boards are quite flexible, however, so for more expensive prints and original artwork, mount board or foam board with a hard MDF type backing would be the better option.
Mount board types
Museum level
For framing any valued original artwork. Cotton museum grade mount board is made from 100% cotton fibre – a traditional paper-making material, proven stable for hundreds of years. It can be un-buffered (neutral pH) or buffered with an alkali deposit which prolongs the stability of the board and provides some extra protection.
Conservation level
For framing original artworks. Conservation grade mount board made from chemically purified wood pulp and then alkaline buffered. The core and facings must meet certain criteria such as light fastness, pH ranges and quality of lamination adhesives.
Standard level
Not recommended for conservation framing. Standard mount board is made from unpurified wood pulp. Unpurified wood pulp will gradually break down and release acidity, thereby damaging the picture. Although many wood pulp boards are now buffered with an alkali and described as ‘acid-free’, this is misleading. Standard mount board will brown over time and it will produce a brown looking core.
Tapes
Ph neutral tapes are the best choice for mounting to prevent ageing. They can come in self-adhesive paper, gummed paper and gummed cotton rag variety. The choice of which really boils down to how expensive the artwork is, how long you want to preserve it, or whether you or anyone else for that matter may ever want to be able to reverse the use of the tape by removing it at some point without damaging the artwork. Gummed tape can be removed by wetting, whereas self adhesive tapes would require solvent use. Can your expensive artwork handle a drop or two of water to remove the tape? Or could it withstand a solvent? Perhaps not, but these are valid questions to ask when choosing your mounting tape.
Mounting tape types –
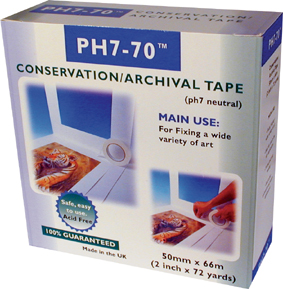
Ph7-70 self-adhesive conservation tape: Is a high quality white 70gsm kraft paper tape with acid-free pH neutral acrylic adhesive. pH7-70 tape has excellent ageing qualities. High initial grab, which is helpful for art on heavier paper, and for working with textured or uneven paper and board surfaces. It is self-wound, with no liner to remove, making for faster working. It is ideal for hinging low value prints and artwork into mounts. Would require solvent to remove successfully.
Gummed Acid Free (Conservation) Archival Tape: Is a white, gummed, acid-free (pH 7 neutral) paper tape. It is coated with an acid-free, water-based acrylic adhesive system, is non-ageing and therefore will not turn yellow. It can be used in most framing projects for attaching artwork. This gummed tape is designed to allow artwork to be released easily from the tape (with water) and is recommended for conservation standard work.
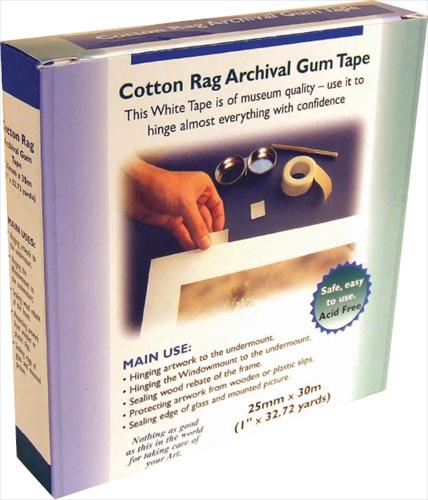
Cotton Rag Gummed Archival Tape: For the ultimate ‘museum quality’ conservation, you can use cotton rag tape made from cotton fibres with a 2% calcium carbonate buffer and naturally lignin (a natural substance in wood derived products that contributes to ageing in papers) free with a pH-range of 7-8.
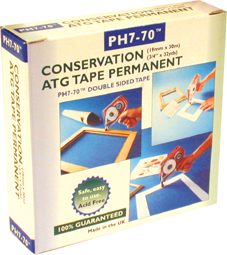
Ph7-70 acid neutral double sided ATG tape: A pH neutral double-sided self-adhesive tape – 19mm x 30m. Conservation grade, pH neutral, double-sided tape, acid neutral, using a water-based, acid neutral acrylic adhesive system which will not react with board or papers and can hence be used for conservation purposes. ATG tape gun compatible, although a tape gun is not required to use it. Important for sticking together double mounts where you are keeping the whole mount environment “acid free”. Cheaper acidic tapes can eventually be seen (as a browning) through the front face of a 1.4mm mount board given enough time.
Hinging
A T-hinge is commonly used to attach an artwork to a backing mount board before front mount is placed over it.
The attachment of the artwork to the mount board by tape should be done by creating ‘hinged’ attachment points between the artwork and the mount board. Hinges should allow the picture to hang safely and should be applied only to the top edge of the artwork. The amount of tape attaching to the artwork should really be as little as possibly required to hold it in place without being seen. On thinner paper types, tape hinges can show through as a bump, so they should always avoid being placed behind the visible area of the artwork.
Hinge types can include T-hinges and S-Hinges both of which can be use to attach an artwork to the backing board. T-hinges are more standard and are stuck to one side of the backing mount board as well as the back of the artwork. They form a T-shape, and allow the artwork to hang and hinge at their attachment point. T-hinges can be paralleled up along the top edge of the artwork being mounted. Lightweight prints may only need 2 T-hinges, heavier ones 4-8 T-hinges, depending on how much space there is along the top edge. This way, you can evenly distribute a long, heavy piece of paper along a row of T-hinges.
S-hinges can be useful if you intend to display the artwork without a top (bevelled) mount. They actually go through holes cut into the backing mount board and attach to the artwork back and the back of the backing mount board. However, the artwork would still require to be kept from touching the glass (which is one of the main roles of the bevelled top mount), so small spacers would be needed in this case to keep the glass floating from the artwork. These can be hidden under the frame rebate.
Common mistakes
A common mistake found with mounted artwork that I see is that the artwork has been surrounded by tape on all 4 sides (usually with one of the cheaper tapes, as I have mentioned before). This will most likely lead to warping or distortion of the paper or artwork with time as it changes with heat and humidity variations as well as age. When something is held down on all four sides, it has no scope for movement (expansion/contraction) in relation to its surrounding mount. To avoid this, mounts should only be attached on the top edge by tape hinges with the other 3 edges left to float/move naturally. The artwork will still be held in place by the mount itself, but will now be able to expand/contract in relation to the surrounding mount.
It is also common practice to attach the tape to the front mount itself, but you may want to consider that the weight of the artwork may be enough to distort the front mount over time (depending on how sturdy its is) so it may be wiser to attach the artwork with tape to the rear mount board instead, which is a more solid intact piece of board. This technique may not be the best option when you need a precision fit of the artwork to the mount, eg if you are trying to show a 6mm white print border edge the whole way around evenly, where any slight offset may look glaringly wrong.
Materials to use/avoid in conservation mounting
Materials to avoid in conservation mounting
Materials to use in conservation mounting
Standard cheap mount board
Conservation or Museum grade mount board
Cheap every day tapes
– cellotape type tapes
– masking tapes
– parcel tape
– frame backing tapes
– glues
Mount backing to conservation grade mount board or a suitable acid free buffer layer
Other conservation issues
Glass : Anartwork should never come in contact with the glass. Spacing the artwork away is necessary for air circulation. The mount usually serves this function, however, sometimes with 3D or deep artwork, eg 3D acrylic, oil paints, sculpted paintings, tapestries and stitched artwork, it may be necessary to add more spacing. This can be done using double or triple mounts, thick mounts, slips, fillets or special spacers. This will also be the case with frames where it is required that the artwork ‘floats’ on a backing board with no mount, in which case spacers can be used to lift the glass off the artwork. Special plastic or wood spacers can be utilised which hide behind the rebate.
Light : An artwork can deteriorate with excessive UV light. Pictures should always be kept out of direct sunlight, but even non direct daylight will provide enough UV deterioration. Fluorescent lights are also a strong source of UV. To combat UV the fluorescent bulbs can be fitted with UV filters. UV filtering glass can also be used in the picture frame.
Heat: Excessive heat can easily distort paper, board or backing board, and even the frame itself in worst cases. It is therefore very important to not hang conservation artwork over radiators, fireplaces or any other heat sources.
Humidity: Humidity can be another source of distortion in artwork and mount board, as well as a trigger for mould formation. Damp or humid environments should be avoided where possible.
Insect Ingression: It is quite common to see common dust mites and other small insects crawl through small gaps in frames and work their way into the picture mount. Often dying there and looking like a smudged bit of dirt on the picture mount or, worse still, they may start breeding there! To reduce the chances or insect ingression, you can tape seal the mount/glass sandwich around the edges (with a good quality pH-neutral tape). You will also want to make a good backing tape seal, especially in the frame rebate corners. A final sheet of brown dust cover paper may also be stuck down on the frame rear which will add another layer of protection.
Summary
Conservation mounting is not just a concept that should be used by museums and fine art establishments, it should be used as an every day practice at every mounting/framing level to prevent your artwork from brown acidic damage that can happen all too quickly with cheaper materials. Be aware of the potential for some unscrupulous framers using cheap material solutions that are about as far from conservation principles as possible. Every framer should have the responsibility to preserve their clients’ artwork as a primary goal – that is every bit as important as the presentation and final appearance of the framed artwork itself.
Single sticky sided ph-neutral (acid free acrylic adhesive) conservation (archival) tape for hinging artwork to the picture, photo or art mount. This tape will not cause browning of artwork and is conservation grade with excellent ageing qualities. High quality 70gsm, self wound (no backing to remove), and works with a variety of paper textures. Size: 25mm wide by 66m length.
This makes it a cheaper way for you to do conservation art mounting for all your photographs, paintings and other artworks that require acid (ageing) protection.