Single sticky sided ph-neutral (acid free acrylic adhesive) conservation (archival) tape for hinging artwork to the picture, photo or art mount. This tape will not cause browning of artwork and is conservation grade with excellent ageing qualities. High quality 70gsm, self wound (no backing to remove), and works with a variety of paper textures. Size: 25mm wide by 66m length.
This makes it a cheaper way for you to do conservation art mounting for all your photographs, paintings and other artworks that require acid (ageing) protection.
An autographed sports shirt requires to be mounted and framed in a narrow black shallow rebate moulding. (Many frames for sports shirts are constructed with deep rebate mouldings, limiting choice).
Method :
Prepare the shirt, iron it and then make it rigid for mounting.
Mount ‘rigid’ shirt by sewing the shirt on to black foam board
Cut a mount to surround the shirt and space it from the backing board with pieces of black core foam board.
Build wooden box walls.
Attach a backing board to the wooden box walls.
Create a frame from moulding.
Glaze.
Fit mount to wooden box.
Join together and finish.
This process sounds straightforward, but the first 2 steps can take over 2 hours to do. Stretching and stitching the shirt to the backing foam board is a slow and manually intensive task.
Lets take a look at each stage –
1. Prepare the shirt, iron it and then make it rigid for mounting
I started off by ironing the shirt, as it would otherwise just be crumpled and creased. I do this by putting a tea towel between the shirt and the iron so that I don’t damage the shirt or signatures in any way. In this example it is a cotton shirt and I do want to get the creases out, so I used the iron on a steam setting. Note: this may not be the best setting for other shirt materials (please consult the garment labels before ironing!). Remember to iron the sleeves and collar to be as close to the way you want them to appear when framed.
Shirt stretched and waiting to be stitchedStitching the shirt to the backing board
To make the shirt rigid, I cut out a piece of mount board in roughly the shape of the shirt but wider, so that the shirt will stretch out and look unwrinkled. The mount board is used white side forward so as not to let a colour show through, making the shirt appear less than white! I made a rounded cut-out at the collar location so that the mount board would not be visible. You can see the mount board in the image shown as I have the collar undone to allow access for stitching. In this project I also made small mount board cut-outs to stretch the sleeves as they had to display the logos on the sides of them correctly. All mount board cut-outs are carefully positioned inside the shirt to give it a flat, stretched out look.
The sewing is done at various points around all the edges of the stretched shirt and sleeves to hold it firmly in place on the backing foam board. I tend to use a standard cotton thread that is as close to the colour of the shirt as possible with a medium sized standard sewing needle.
Making hidden stitches behind the collar
You can sometimes sew directly from the visible side of the shirt to the foam board at the back if the thread is very close in colour and you make stitches at the location of existing shirt seams where they will not be as noticeable.
Where possible, just hide the stitches – eg behind the collar is a great place. The shirt will need to be stitched several times and in different places along the neck and shoulders as this will be the best anchor point for ‘hanging’.
Stitches through the backing foam board
I usually do about 20-30 separate stitching points in total to secure the shirt to the backing board. After I finish each stitch I cut the thread, then tape down the loose ends of the thread to the back of the foam board with ph7-70 self adhesive conservation tape.
Stitched shirt standing vertically
After the shirt has been stitched to the backing foam board, you should be able to stand it upright and see how it looks when it is vertical. If you see any loose or crumpled areas or some other gravity effect you don’t like the look of, then you will need to add in another stitch or two to make it look better. It should be noted that this is how the shirt will look in the frame while hanging on a wall.
3. Cut a mount to surround shirt and space it from backing board with pieces of black core foam board
Cutting a mount for a shirt is no different from cutting a mount for a picture, except that shirts are large and hence the surrounding mount will be large too! You also have to be able to keep the glass away from the shirt and hence need the box frame to do this. The mount itself should be wide enough to hide the internal sides of the box. After I cut the mount, I use strips of black core foam board (so it’s dark and invisible should anyone peek in behind the mount) to space the mount from the backing foam board. The foam board strips are held in place by ph7-70 ATG double sided tape.
Stitched shirt with mount attached to backing board
Once finished, the mount and foam board strips and foam backing board should look something like this. It is starting to look like the finished item.
4. Build wooden box walls
Box frame walls mitred and waiting to be joined
For the walls of the ‘box’ I just use thin strips of inexpensive 44 x 12mm (1 3/4″ x 1/4″) pine wood bought from a local timber store. I use the mitre guillotine to mitre them and join them with v-nails as I would for a standard frame.
Box frame walls with v-nail joins on both sides
The v-nails are put into both the top and bottom edges of the box corners, as well as wood gluing them together. The size of wood you use here will determine the depth of the box, so if you want a deeper box then go for >44mm if you want less depth go for <44mm. The whole point of the box is for it to be deep enough to keep the shirt (or another 3D object) from contacting the glass. Just measure your object’s deepest dimension to come up with an acceptable depth.
5. Attach a backing board to wooden box walls
Taped and screwed MDF on back of wooden box
I then cut out a piece of 2mm MDF to the exact outside edge size of the wooden box walls. This backing MDF can be screwed or nailed down to the box walls. The end result will be an open sided box, almost like a crate with a front missing. I finish the long edges off by taping them together with ECO25 frame backing tape before securing the MDF backing with pan headed wood screws.
6. Create a frame from moulding
Front frame sitting on top of wooden box
The next step is to cut the actual frame moulding. Because we have created a box (in effect a deep rebate), we can use any shallow rebate moulding to surround this box. This gives us a lot of flexibility when it comes to moulding choice – we can use any moulding, as opposed to just using the one or two deep rebate mouldings that we may happen to have in stock. We cut the front frame to fit the box outside edges. Once finished, it should sit perfectly on the wooden box as shown. We can remove the frame for now and place it to one side. One point of note is that there will be no weight bearing done by the front frame as the cord and d-rings will be screwed into the box, so theoretically, you can use quite fine moulding here.
7. Glaze
Mount and shirt with glazing
I usually use a small vacuum cleaner to clear out any loose specks of dust, dirt and hairs or threads inside the foam or mount enclosure and the shirt surface before fitting the glazing. Remember that this is the last chance to spruce the shirt up before displaying it. We can now cut the glazing to fit exactly on top of the mount after cleaning both sides of the glass. This will keep all external dust, dirt etc out of the shirt and mount area.
8. Fit mount to wooden box
Shirt mount with glazing fitted into box enclosure
The mount with shirt and foam backing can then be fitted into the wooden box that we created earlier. The mount edges (and glass edges) should completely cover the wooden box to its outside edges. If the depth of your mount is slightly smaller than the depth of the box, you can pad out the difference with foam board offcuts.
9. Join together and finish
Right angled picture plate holding frame together
The next step involves placing the constructed outer frame (moulding) over the glazed and boxed shirt. We then proceed to join the moulding to the wooden box. For this I am using brass plated right angled picture plates which are screwed into both the wooden box sides and the back of the moulding.
Frame finishing with D-Rings, low stretch picture cord and felt pads
To finish the frame I delicately flip it over, face down on bubble wrap to protect the moulding face from damage and place felt pads at each bottom corner (for wall protection) as well as brass plated two hole d-rings at the side and at the bottom of the box frame (not the front frame) to distribute load. I tie it up with #3 low stretch picture cord.
The frame is now finished and looks just like the first image at the top of this article.
Discussion
3D box frames can be accomplished more simply with a deep rebate moulding, quite often without a mount, but this generally limits the choice of mouldings that you can offer. It also limits the depth of the frame box to whatever the rebate depth is, which may be fine for some thinner 3D objects and collarless sports shirts. With the method described in this article, I can build deeper boxes if needed so that I can frame something with bigger depth dimensions without the need for specialised deep rebate mouldings.
The only downside to 3D frames is the time it takes to make them, which can take anywhere from upwards of 5 hours.
Sometimes you may find yourself using a moulding that is just way too narrow to attach a screw and D-Ring to. If you do, the rounded edge of the D-Ring can end up being visible from the front of the frame when hanging on the wall, which isn’t pleasant to look at.
One alternative is to continue to use D-Rings but instead of screwing the D-Rings to the frame, you can attach the D-Rings to the backing board by using Bifurcated Rivets. This is method I’d recommend for lighter frames only as there is a finite strength to MDF backing boards. The Bifurcated Rivets come in both nickel plated and brass plated finishes and require no specialised hardware to fit (a ruler, pencil, bradawl, screwdriver and hammer will suffice).
The procedure for attaching them to the backing board is as follows –
1. Select a backing board at least 2mm thick MDF. (a relatively solid material). Mark the two points where the rivets are going to go (about 1/3rd way down from top and about 30mm in from sides)
2. Use a bradawl to punch holes through the MDF at your measured points. make the holes close to 3mm in size – just wide enough so as to allow the bifurcated rivets to push through.
3. Push the rivet through the hole of the D-Ring and then through the hole you have made in the MDF.
4. Turn the MDF over to see the rivet protruding from the other side of the board. Place the D-Ring and Rivet head on an old wooden off cut, and place a screwdriver over gap in the rivet legs.
5. Hit the screwdriver shaft with a hammer to start to splay the rivet legs.
6. Take away the screwdriver and splay the rivet further apart with a hammer. Flattening the rivet legs against the board. If you are not using a barrier board between the backing and the artwork, then at this stage you should tape over these ends as they may push against the artwork (which is really not desirable). I recommend using a mount board or similar barrier layer of acid free board between the artwork and the backing board.
7. Repeat with other D-Ring.
8. Assemble the frame and finish tying picture cord between the two D-Rings. Congratulations the picture frame is now ready to hang.
A clip frame sandwich held together with Swiss Clips
We sell a lot of frameless clips which are used to create a frameless picture or clip frame.
The clip frame should consist of a ‘frame sandwich’ of –
Glass/perspex
A picture mount (optional)
Artwork
Backing mount for art protection (optional)
Backing board (Usually hardboard or MDF for strength).
The clip frame has its use where either you don’t want to go to the expense of having a frame for your artwork, or you would like to have artwork displayed right to the edge of the frame.
Clips can accommodate sandwiches of different thicknesses. In order to find out how thick your sandwich is just total the thickness of each part of your sandwich eg. (glass 2mm + mount 1.4mm + art 0.1mm + backing mount 1.4mm + backing board 2.0mm = 6.9mm, so I’d likely need to use the 7.5mm swiss clips or the 8mm frameless clips).
Glazing should always be smoothed around the edges to avoid exposing sharp edges. Glass in particular can be very sharp when left raw after a cut so make sure to smooth the edges of the glass before using it in a frameless clip frame, a Tellum pad is ideal for this purpose.
There are several clips available to you for holding the frameless/clipframe sandwich together and there are also a few options available for hanging the frameless clip frame too –
We now have in stock brown picture hanging cord. It comes in – Brown Picture Hanging Cord No.1, Brown Picture Hanging Cord No.2, Brown Picture Hanging Cord No.3
varieties/sizes. It has similar strength and characteristics as white picture hanging cord, but it is made in polypropylene. It does look very handsome on the back of a quality framing job. The colour of the cord would suit the bronze coloured D-Rings, but would also look good with Brass plated D-Rings too.
Stretched canvas prints can be easily fitted into a picture frame. Several methods are available, but one of the easiest is probably the use of offset clamps. These are little metal steps that come in varying step sizes of 3.2mm, 6mm, 9mm, 12mm, 18mm, 25mm, 31mm. The clamps are all approximately 10mm wide.
The different depths of step are available in order to accommodate most common depths of stretcher bars on canvas prints. The frame may also include a slip which will decrease the depth of the frame rebate and require the use of a smaller clamp size.
The stretched canvas is placed into the frame and each clamp is screwed down (by use of #4 zinc plated screws) in close proximity of the stretcher bars of the stretched canvas in order to hold it in place.
If the step ends up being in between a step sizing, you can use small pieces of felt in order to pad out the spacing.
Typically to finish a framed canvas print I will be finish it off as shown below by placing the stretched canvas in the frame, then placing a backing board (2mm MDF) on to it, taping in place with ECO15 or ECO 25 frame backing tape then clamped down in 2-5 places on each side (depending on canvas size) with the offset clamps. Once offset clamped on all four sides, the canvas will be securely fitted in the picture frame, and will be ready to attach a hanging solution in this case D-Rings and cord.
In order to keep the metal backs of the offset clamps from scratching a wall surface / paintwork, two small round felt pads can be placed on the bottom corners of the frame as shown which will keep the clamps from being in contact with the wall.
Alternative solutions include spring retaining clips, z-clips or bendable brass plates.
“Do you have one just like that moulding but smaller?”
“Do you have that one but a shade lighter?”
“Do you have that in a warmer shade of gold?”
Sometimes, being a picture framer can be frustrating. You never have enough mouldings to cover the infinite breadth of consumer needs and desires these days.
There are usually two types of customer, one who trusts you as a framer, and trusts your judgements and will generally say “I don’t mind, just make it look nice”. And then there are those who are more, shall we say, picky. They tend to want to micromanage every aspect of the framing job right down to requesting a moulding that you have never seen before, to controlling the width of backing tape used! (OK, I exaggerate a wee bit!)
We are always driven to try to expand our collection to incorporate latest trends and fashion. This, as you can guess, can be challenging. Our collection of mouldings has evolved to try to cater for everyone, but there is always the risk that it just keeps getting augmented. We risk becoming a stockist of old, hard-to-find mouldings in 20 years’ time! We have some mouldings that have not been used in several years that we really wished we’d not bought, and some that fly off the shelves quicker than we can buy them in! An annoying one (annoying in colour as well as history) is the BRIGHT RED one. The supplier shipped it to us in error and, when informed about it, offered to sell it to us at a huge discount rather than pay for shipping it back. Of course, we chose to take it at discount, and it has subsequently resided untouched in the workshop ever since!
In reality, the difficulty lies in having too much choice. I have long thought that, if we were to start over again, we’d stock 4 mouldings: one black, one cream, one gold and one silver. Just think on how simple life would be!
Challenges for the framer don’t end there, we also have the different mount board colours and thicknesses to add into the mix too. It’s not much wonder that eventually, whether we like it or not, we are driven into becoming a framing stockist.
If anyone wants some narrow, bright red moulding, just drop us a note!
Picture Hanging Cord or Picture Hanging Wire? That is the question. A lot of people assume that picture hanging wire is stronger than picture hanging cord. This can be a false assumption. Many polyester low stretch quality picture cords can be a much more robust solution than some picture wires.
Picture Hanging Cords
Picture cords (especially quality low stretch polyester) have strength characteristics that will not be affected by environmental issues such as moisture degradation or rot (unlike string which you should never use for picture hanging). They (along with wires) are rated by their breaking strain. The following table lists the recommended loading –
Even with the maximum recommended loads for the cords, it is always safer to give yourself a larger margin for error and switch up to the cord size above what you think you will need.
The cord of course will only be as secure as the quality of the knot that is tied coupled with the robustness of the picture hook and hanger that the cord is attached to.
Polyester low stretch picture cord will approximately stretch only about 12% as opposed to 26% or more for for cheaper alternatives. This should ensure that you never see your picture hook being exposed due to cord stretching with load.
Picture Hanging wire
Stainless Steel Picture Hanging Wire is the alternative to picture cord. It will not corrode, is of excellent quality and will shape and wrap easily. Similarly to cord it will still require a good knot tying technique.
Brass picture hanging wire has brass strands wrapped around a strand of steel.
Wires are specified by a Maximum Picture Weight and this should be treated with a margin for error. Ideally you should pick a picture wire that is double the weight specification of your picture.
Whether you choose picture hanging cord or picture hanging wire to hang your picture, you will need to choose based on load criteria, ability to securely tie to fixings and personal choice as to what you think works best for you.
Picture frame hanging, (or photo frame hanging) involves choosing the correct picture hanging hardware and picture frame wall hooks to match your picture frame size, weight and wall type. This will include choosing the correct hook to attach your frame to the wall. Whatever picture hook you go for make sure that it can support the weight of your frame. If in doubt, you can use more than one picture hook to support each frame, or alternatively go for hooks and hangers that exceed your needs.
The basic picture hook available is the Floral No1 Picture Hook, they are a cheap but robust option with a hardened steel pin. They will work hammered into wood or plaster for small light frames.
The range of Floral Picture hooks go up in size and robustness with Floral No2 (2 hole) Picture Hooks to Floral No3 (3 hole) Picture Hooks (pictured on the left). Each comes with brass capped reinforced steel pins to securely attached them onto the wall by hammer.
Floral picture hooks are also available as 1 hole safety picture hooks and 3 hole safety picture hooks which have a spring locking mechanism to secure the cords into the hooks.
Another form of picture hanging hook is the picture rail hook, which is specifically designed to hang over the picture rails found in some higher walled or Victorian styled houses. We have brass plated picture rail hooks, bronze plated picture rail hooks and white picture rail hooks. There is also a narrow version of the bronze plated picture rail hook available. The picture rail hooks hook onto the picture rail, and you can run a picture cord or picture wire down to attach the picture frame to, this is a traditional form of picture hanging, which also has the additional benefit of not leaving picture hook pin holes all over your walls.
Other Picture Hooks
There are also a couple of speciality picture hooks available –
The Toly hard wall picture hook has short hardened steel pins which are used for nailing the hook into hard brick walls.
The other is a plasterboard picture hook which has a special flat spike which attaches firmly into plasterboard walls.
Standard D-rings come in 1 hole and 2 hole variety. 2 hole D-rings are slightly larger and made from slightly heavier duty metal than 1 hole D-Rings and are used to hang heavier frames.
D-rings are usually placed about 1/3rd of the way down the picture frame on each side. They are attached by pan headed screws which can be different lengths depending on the depth of your moulding. If you put a 13mm screw through a 12 mm moulding then you will end up punching through the picture frame face which would obviously not be a desired outcome, so choose your screw lengths wisely!
The D-Rings can come in standard size, or small sized to suit smaller moulding widths and smaller frames.
Another form of D-ring is the solid ‘D’ D-ring which is made from one solid loop (stamped metal) ‘D’. The sold loop may give extra security in some applications. Standard D-rings are formed with the ‘D’ made from a non-continuous looped D of metal.
You can also get Fancy loop D-Rings (is that still classed as a ‘d’?) which are used purely for artistic effect, but require small pins rather than screws for attachment to the frame edges. This type of D-ring is recommended for lighter frames only.
Angled D-ring picture hangers are another option. They come in pairs (left +right) and give you the security of a two-screw fixing on all types of moulding, including narrow frames. The angled D-ring hanger is angled to give the correct alignment of the cord or wire and to minimise stress in the frame.
In summary, D-rings are by far the most commonly used way to hang picture frames. They can be bought in bulk with multi-packs too.
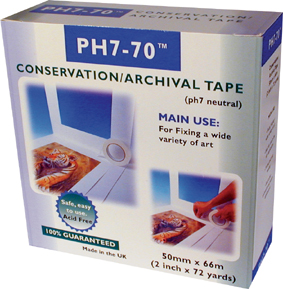 We are now stocking the popular ph7-70 conservation (archival) mounting tape (25mm x 66m) in an unboxed variety with a significantly discounted price. The tape is identical (25mmx66m) to the boxed version as shown in the image, but it is supplied without the box.


 Picture frame hanging, (or photo frame hanging) involves choosing the correct
  The range of Floral Picture hooks go up in size and robustness with Floral No2 (2 hole) Picture Hooks to Floral No3 (3 hole) Picture Hooks (pictured on the left). Each comes with brass capped reinforced steel pins to securely attached them onto the wall by hammer.


